Knowledge Graphs
The Knowledge Graphs component is where users create and manage the ontology-based semantic layer in Timbr.
Each Knowledge Graph represents a virtual knowledge graph built over existing data sources, combining the ontology (business concepts, relationships, and logic) with the connected data. To be fully functional, each Knowledge Graph must be associated with at least one data source, enabling modeling, mapping, querying, and virtualization.
This structure allows Timbr to expose business entities and relationships consistently across SQL queries, BI tools, and AI systems, without moving or duplicating the underlying data.
In a specific Knowledge Graph page, users can connect one or more data sources, define a virtualization engine, set an active data source, and adjust the data model settings according to their needs.
The ontology defines the structure and semantics of the Knowledge Graph, while the Knowledge Graph includes both the ontology and the connected data.
Supported Back-ends:
Timbr supports full back-end integration to any relational database that is SQL / ANSI SQL compliant, or can be queried in SQL. The connection can be established either by a JDBC or ODBC connector.
The Timbr platform currently supports the following back-ends:
- Amazon Athena
- Amazon Redshift
- Amazon S3
- Apache Drill
- Apache Hive
- Apache Spark
- Azure Blob Storage
- Azure Datalake Storage
- Databricks
- Google BigQuery
- Google Cloud Storage
- Impala
- Microsoft SQL Server
- MySQL
- NetSuite
- Oracle
- PostgreSQL
- Presto
- Salesforce
- SAP Hana
- Snowflake
- Trino
- Vertica Analytics Platform
More can be added by request
Manage Knowledge Graphs
All the available Knowledge Graphs and connected datasources can be found in the Knowledge Graph Manager component, which can be accessed through the Manage tab by clicking on Knowledge Graphs.
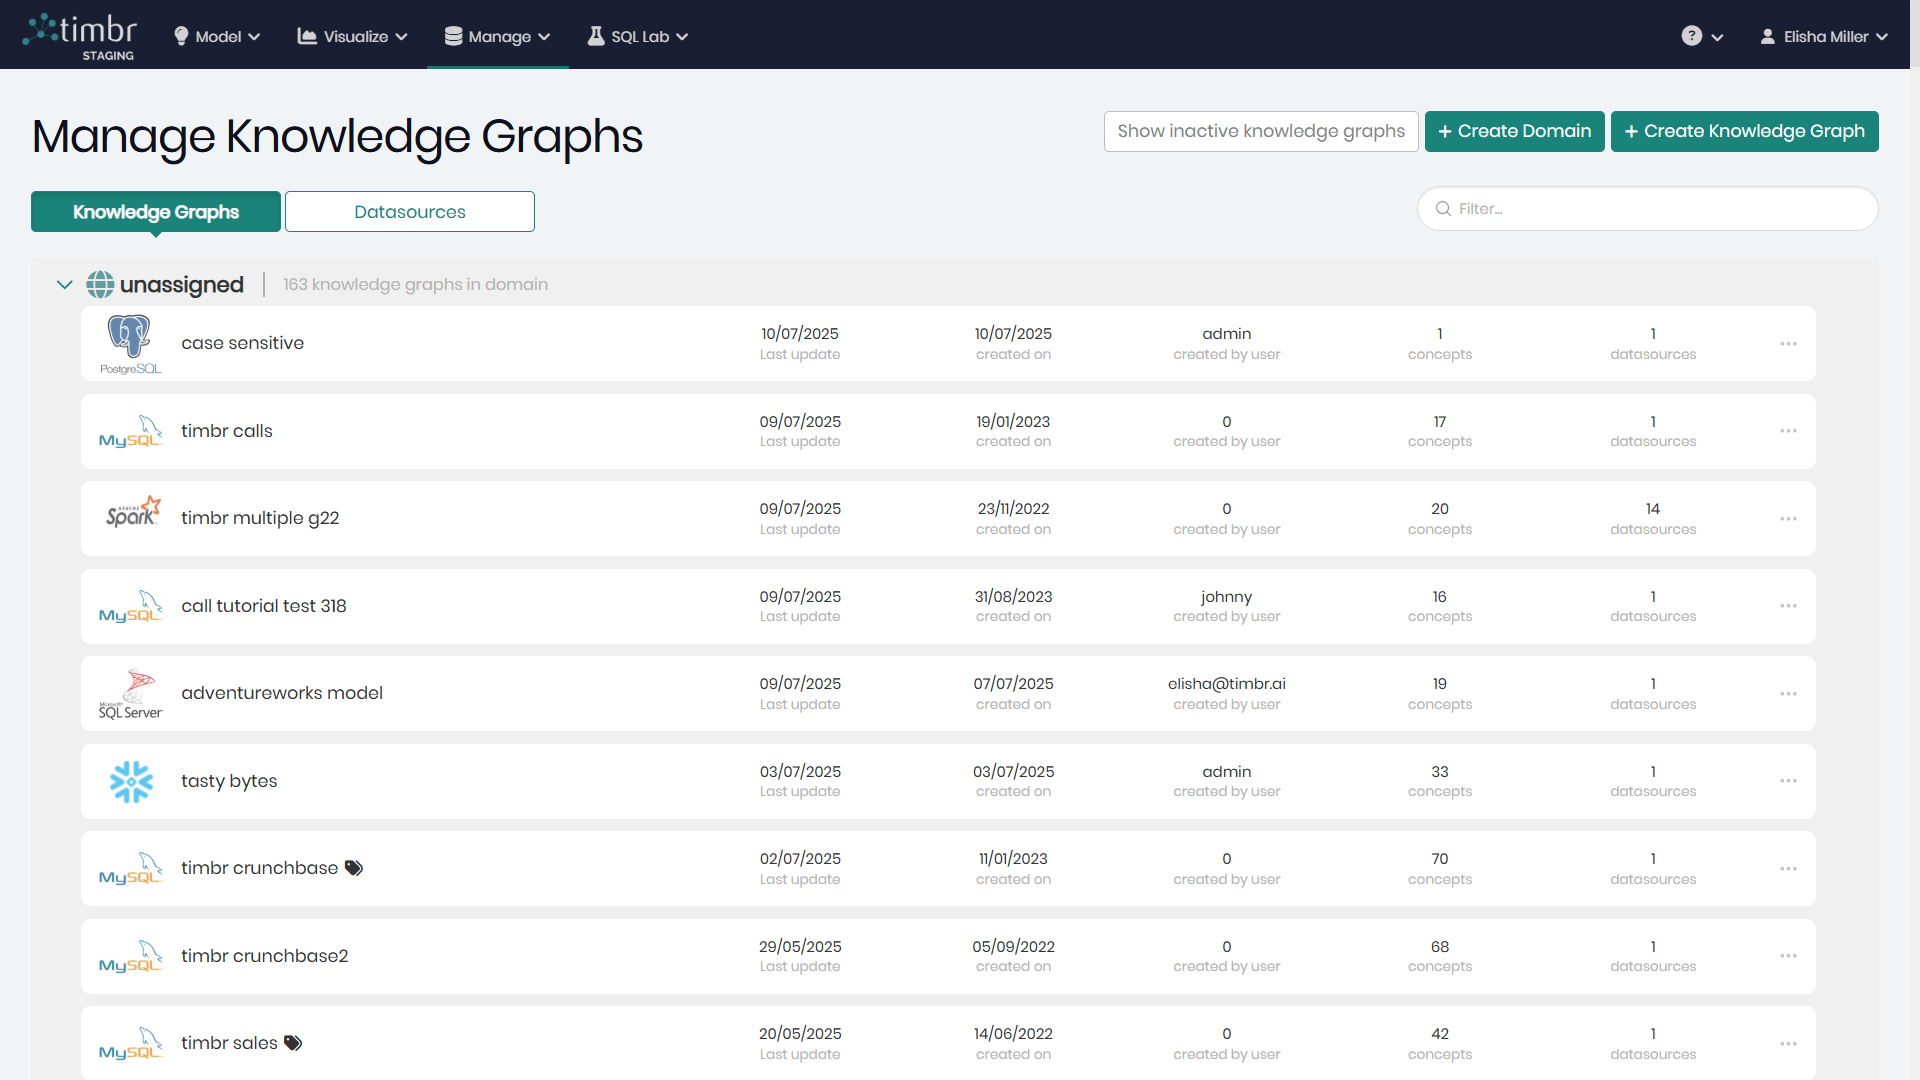
Each row represents a knowledge graph.

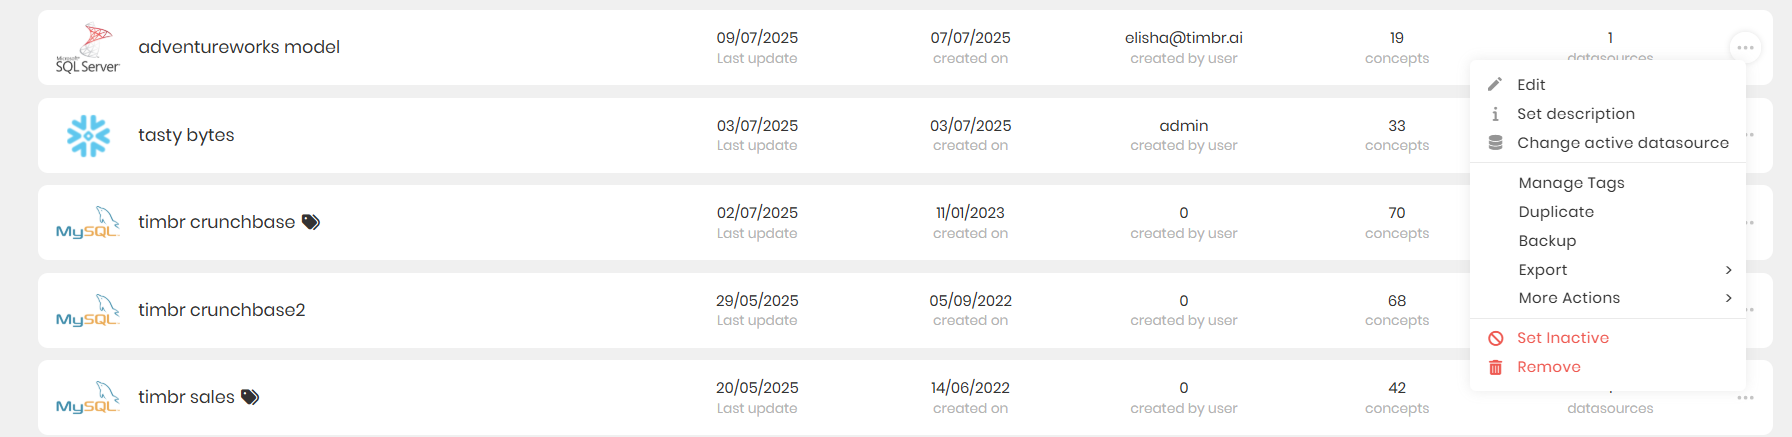
At the end of each row there are 3 horizontal dots that when clicked on offer the following additional options on the selected Knowledge Graph:
Edit - Opens a window to edit the datasources and the different configurations of the selected Knowledge Graph.
Set description - Allows users to add a description to better explain what the Knowledge Graph represents.
Change active datasource - Enabling to choose the active datasource that will appear when querying the data.
Manage Tags - Opens a pop-up window to manage the existing tags given to the knowledge graph, as well as the option to add new tags.
Duplicate - Duplicates the selected knowledge graph.
Backup - Creates a backup of the knowledge graph.
Export Knowledge Graph Options
When hovering over export the following export options become available:
- Remote environment - Export the knowledge graph to a remote Timbr environment.
- Local environment - Export the knowledge graph to a local Timbr environment.
- Export to SQL - Generate a SQL script that defines the structure of the knowledge graph.
- Export to OWL - Generate a TTL file that represents the ontology in OWL format.
- Export to PowerBI - Open a guided window for connecting the selected knowledge graph to Power BI using a .pbit template.
For full instructions on how to use each export option, see:
Exporting a Knowledge Graph – Step-by-Step
More Actions - When hovering over More Actions the following options appear:
- Model - Opens Timbr's Ontology Explorer to model and edit the selected Knowledge Graph Model.
- Map - Opens Timbr's Data Mapper to create, edit and delete data mappings of the selected Knowledge Graph.
- Explore - Opens Timbr's Graph Explorer in order to explore the selected Knowledge Graphs data on a graph interface.
- Copy Ontology Name - Copies the Ontology name to the clipboard.
- Query - Opens Timbr's SQL Editor in order to query the selected Knowledge Graph in SQL.
- Ontology Views - Opens Timbr's Ontology Views component to create, edit and delete data views of the selected Knowledge Graph.
- Ontology Lineage - Opens Timbr's Data Lineage component to fully understand the selected Knowledge Graphs layout and hierarchy of its data and its sources behind the scenes.
Set Inactive - Allows users to mark the Knowledge Graph as inactive.
Remove - Removes the selected knowledge graph from the environment.
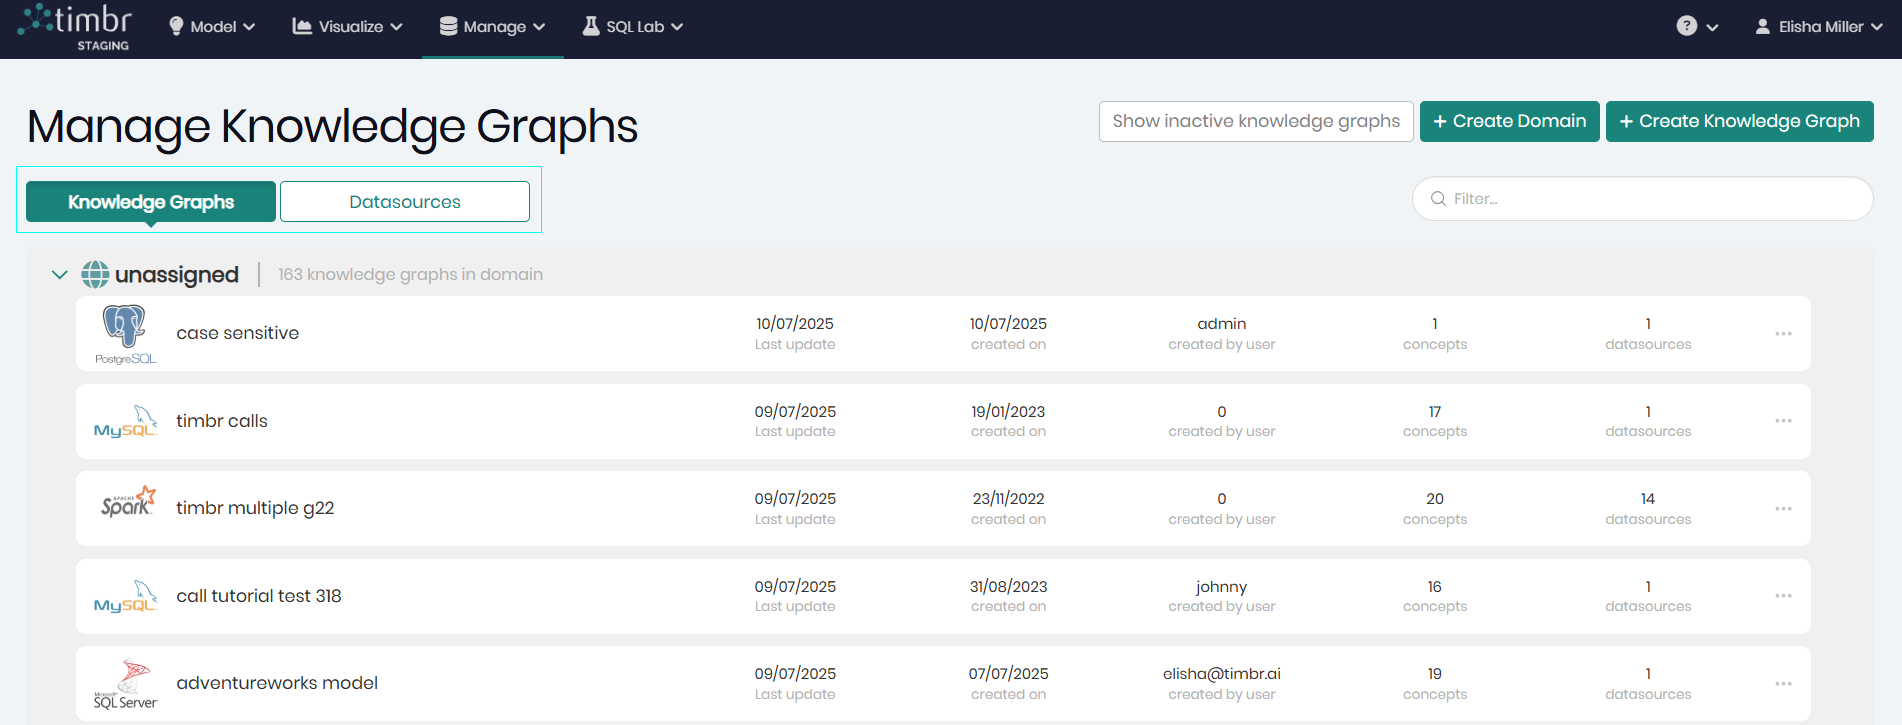
Above the different Knowledge Graphs are two tabs giving the ability to switch between viewing the different knowledge graphs and datasources in the environment by choosing the desired tab.
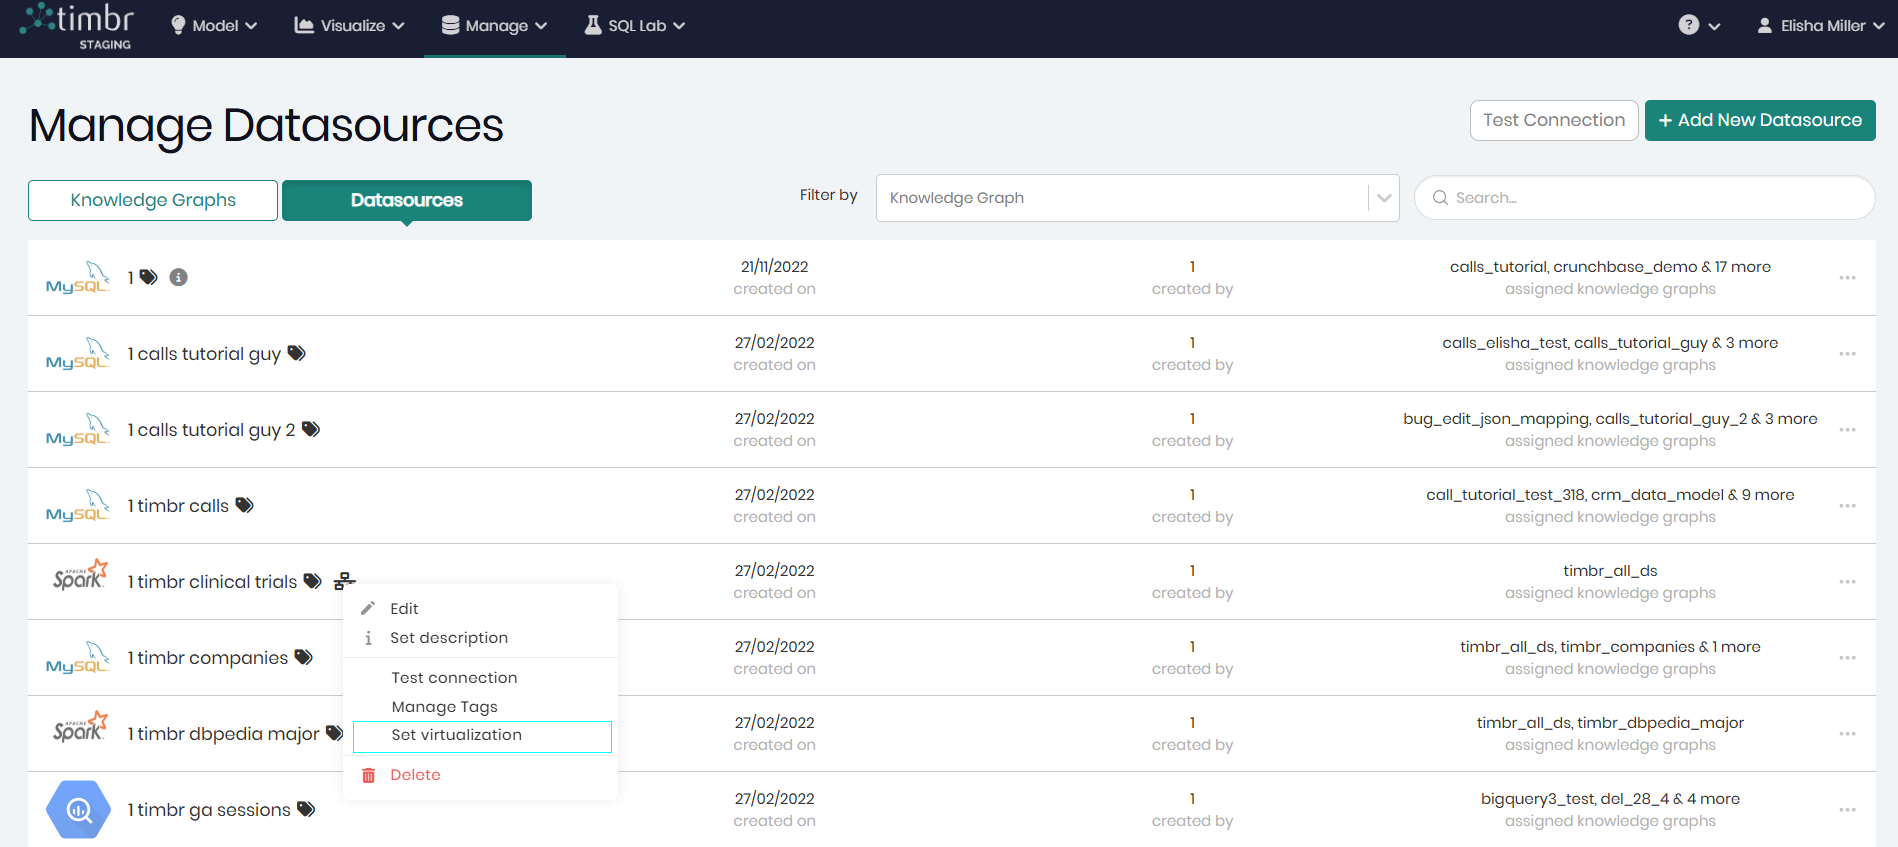
When switching to the Datasources tab, each row will represent a datasource that has been added to the environment. Here too, each row contains 3 horizontal dots that offer the following options on the selected datasource:
Edit - Opens a window to edit the selected datasource and its different configurations.
Set description - Allows users to add a description to better explain what the Knowledge Graph represents.
Test Connection - Executes a quick test to verify the datasource’s connectivity, checking if it is active and responsive.
Manage Tags - Opens a pop-up window to manage the existing tags given to the datasource, as well as the option to add new tags.
Set virtualization - Allows you to enable or disable virtualization for the selected datasource via a pop-up window. (This option is available only for datasources configured with virtualization capabilities as discussed below).
Delete - Deletes the selected datasource.

Timbr offers Virtualization with Apache Spark and Databricks, so in addition to the name given to the datasource, a small icon appears next to each Apache Spark or Databricks datasource to indicate virtualization capability. When the virtualization is on the icon will be green, when it is turned off the icon will be black.

To turn the Virtualization on and off the virtualization icon can be clicked, as well as the 3 horizontal dots. Through either option you will find Set Virtualization In addition to the 5 options every datasource has which are: Edit, Set description, Test connection, Manage Tags and Delete.
After Set Virtualization is clicked, in the window that appears, when the With virtualization toggle is turned on and Set virtualization is clicked on the bottom right, virtualization will be turned on and the icon will show green. When the With virtualization toggle is turned off and Set virtualization is clicked on the bottom right, virtualization will be turned off and the icon will show black.

To the right of both the knowledge graph and datasource tabs is the search filter enabling one to search through the knowledge graphs and datasources using the search bar.
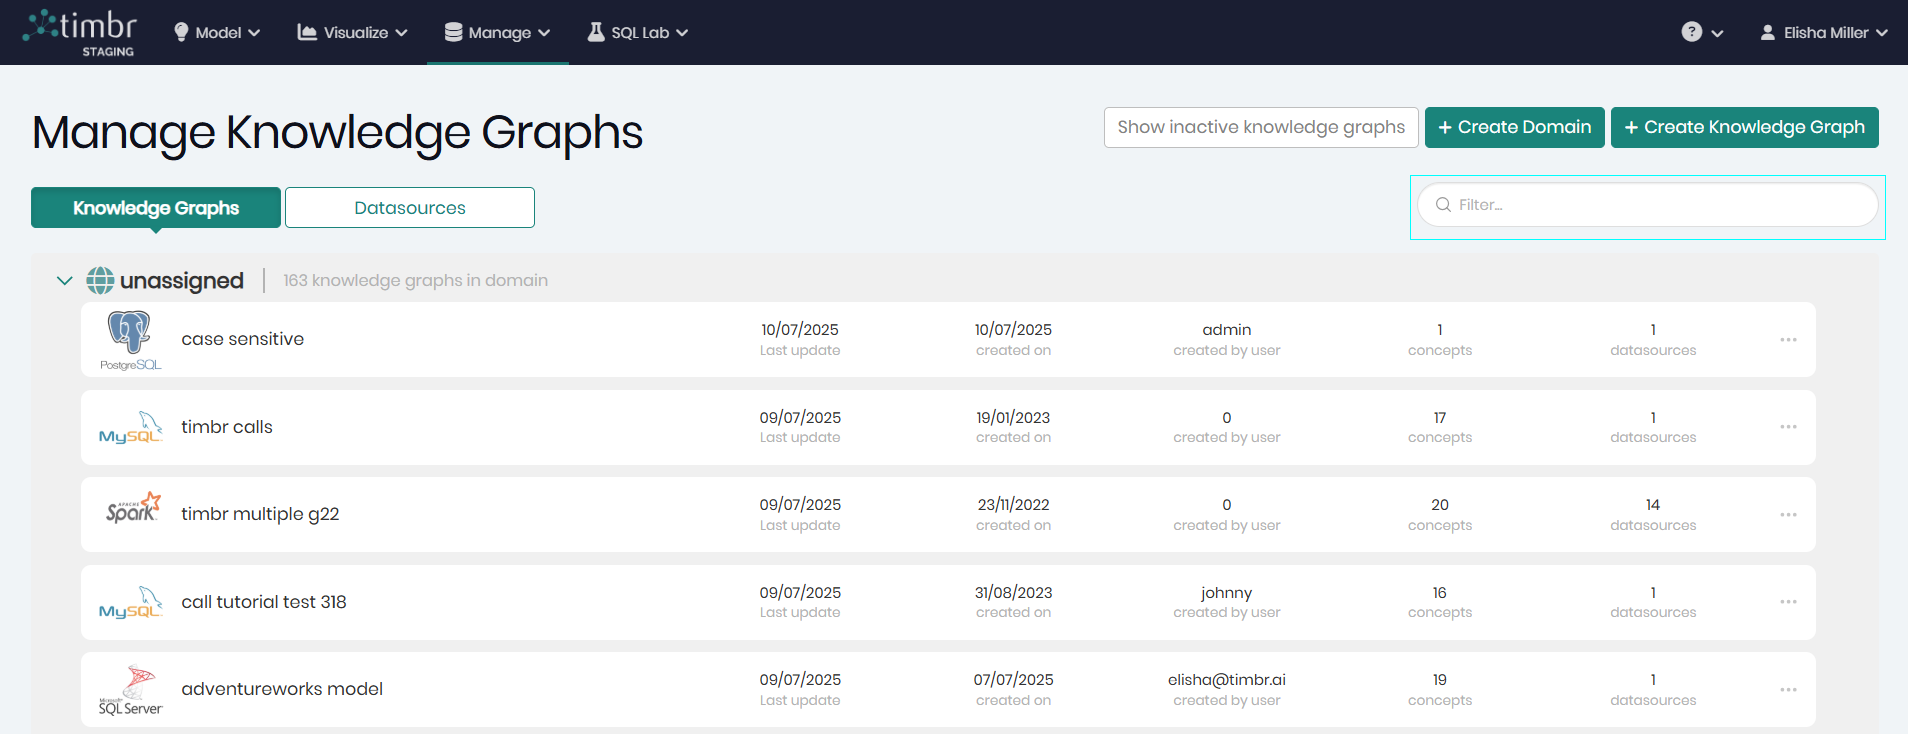
When the Knowledge Graphs tab is chosen, above the filter, are the following three buttons:
Show inactive knowledge graphs - When clicked on, only inactive knowledge graphs will appear. To return to the active knowledge graphs, the Show knowledge graphs must be clicked.
Create Domain - When clicked on, a pop-up will appear in order to create a new domain and assign knowledge graphs to that domian.
Create New Knowledge Graph - When clicked on, a pop-up will appear in order to begin creating a new knowledge graph.

When the Datasource tab is chosen, on the top right is Test connection which when clicked on will open a window with a list of datasources that can be selected in order to test their connection. Next to Test connection is Add New Datasource that when clicked on will open a pop-up in order to begin adding a new datasource to the environment.

Knowledge Graph - Create/Connect to a new Knowledge Graph
Every Knowledge Graph is created through the timbr thrift-server where the Knowledge Graphs are stored and managed.
When a Knowledge Graph is being created or edited, all the information about the Knowledge Graph and back-end datasources are presented except for passwords and/or private keys.
Please note that not all users have access to create knowledge graphs and/or data sources, this is determined by the platform admin.
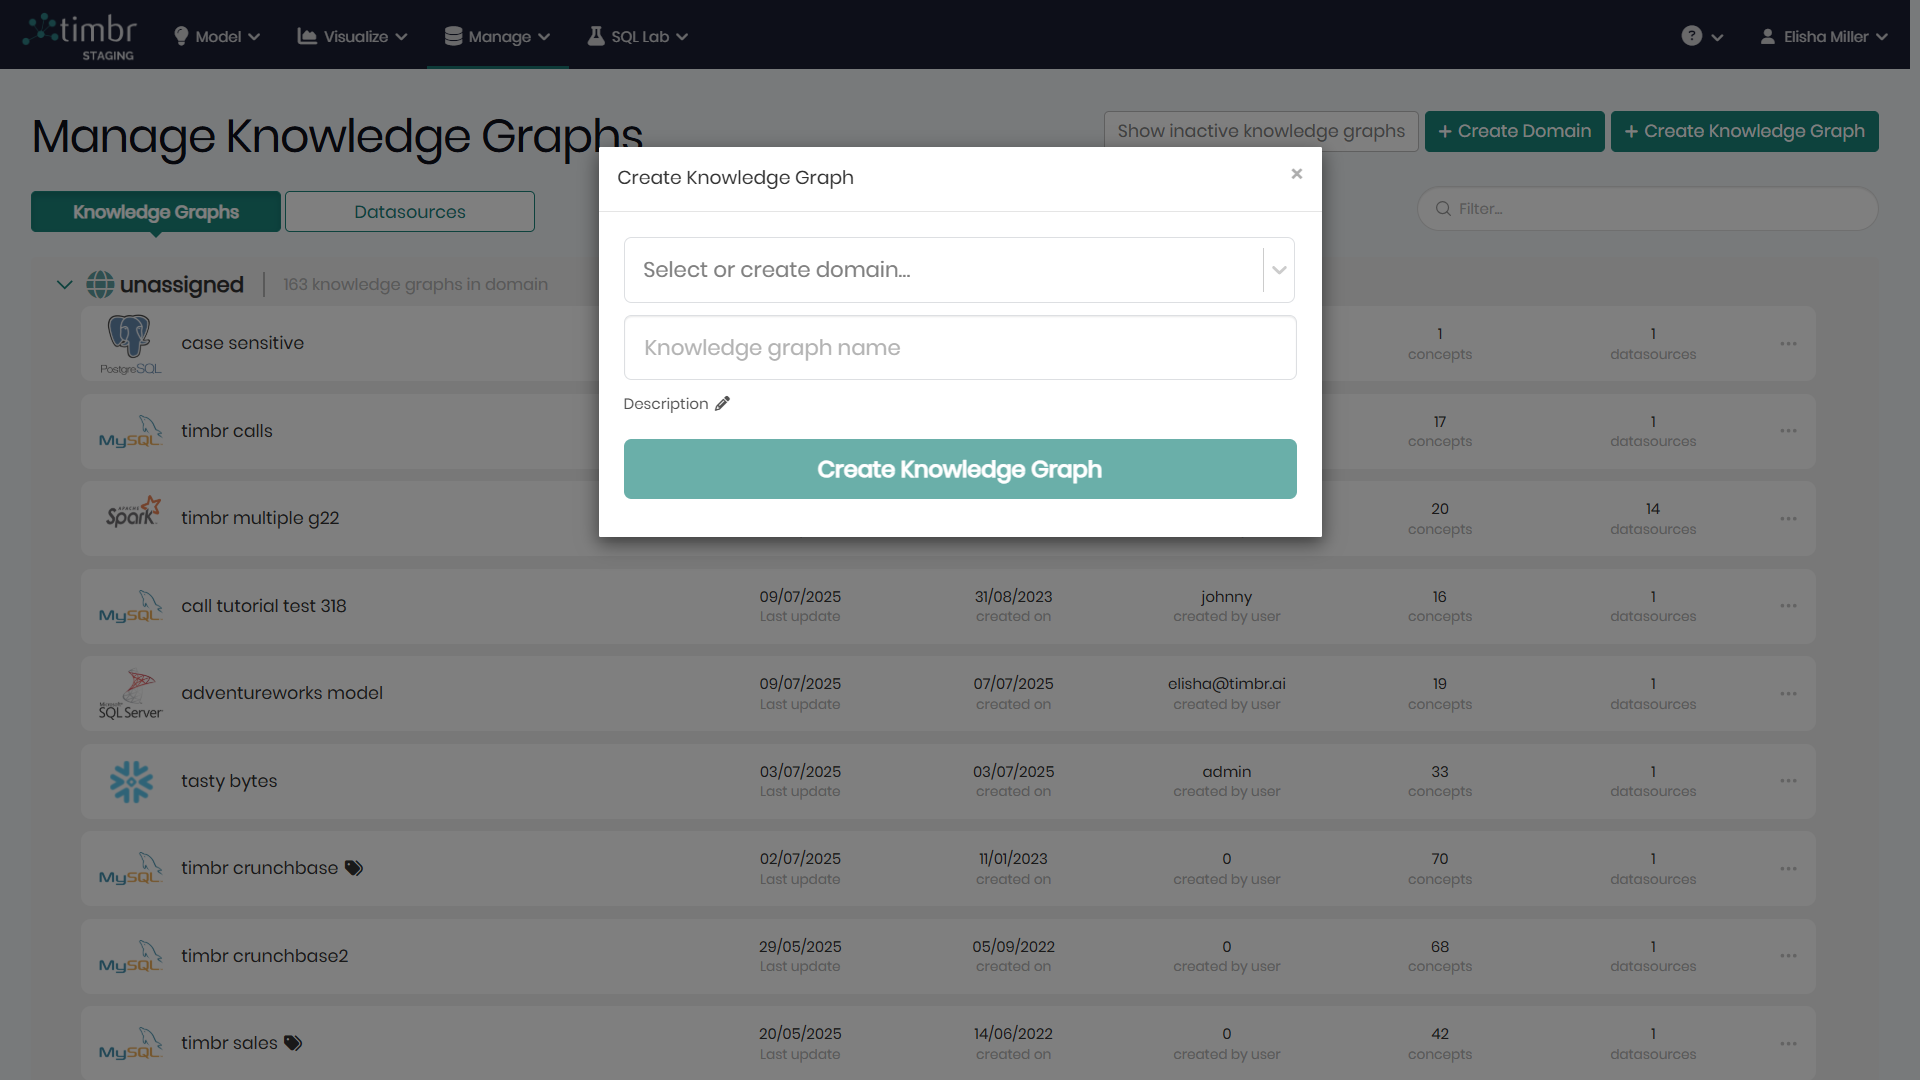
The creation begins with giving the new Knowledge Graph a Name and an optional Description. Additionally, users can assign the new knowledge graph to an existing or new domain. If no domain is chosen, the new knowledge graph will appear under the unassigned domain.
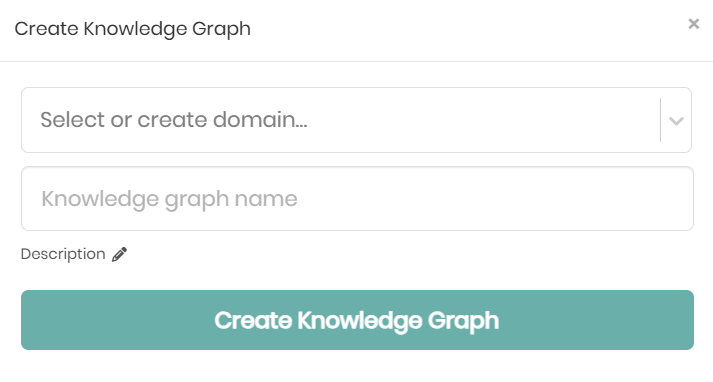
The knowledge graph can then be created and saved by clicking on Create Knowledge Graph which will open a new window in order to connect the desired datasources to the knowledge graph, as well as edit its different configurations.
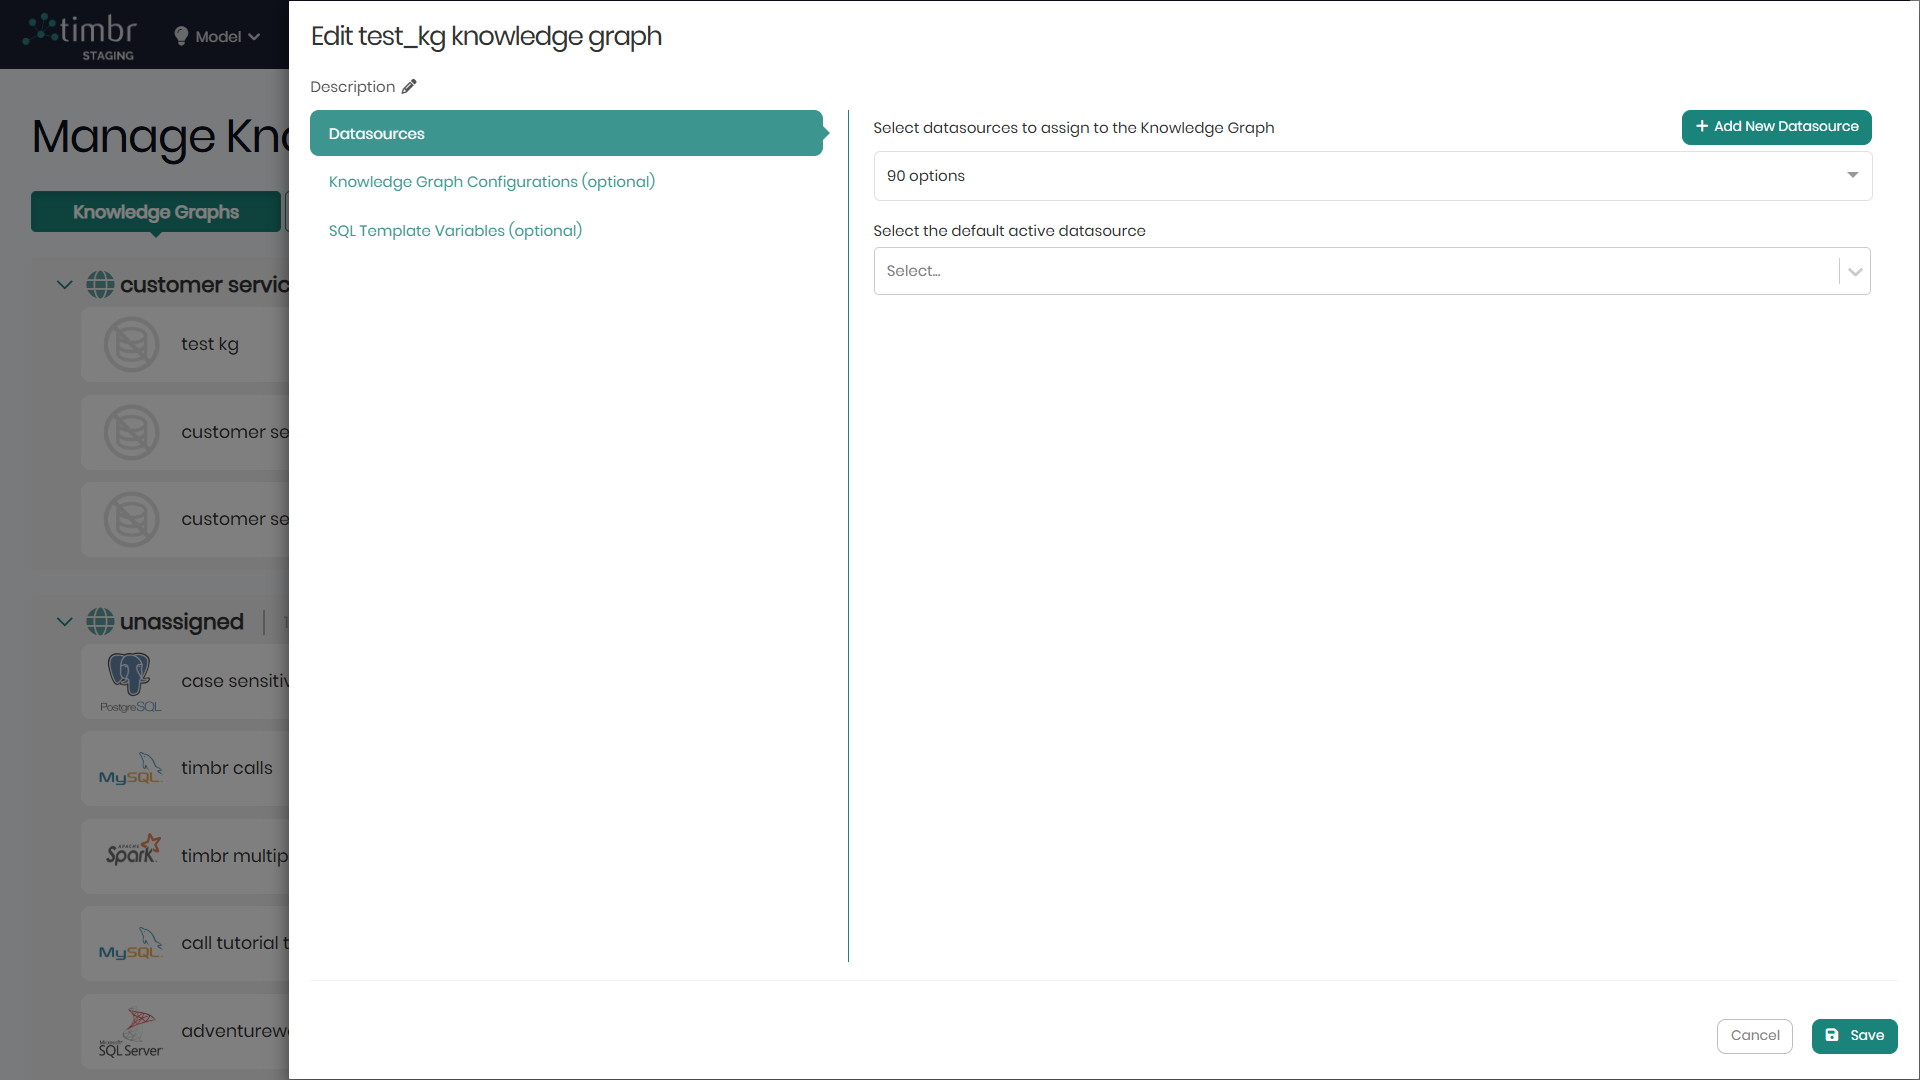
In the new window, beneath the name and description are three tabs, Datasources, Knowledge Graph Configurations and SQL Template Variables.
Datasources
In the Datasources tab there are two ways to connect a datasource or multiple datasources to the knowledge graph:
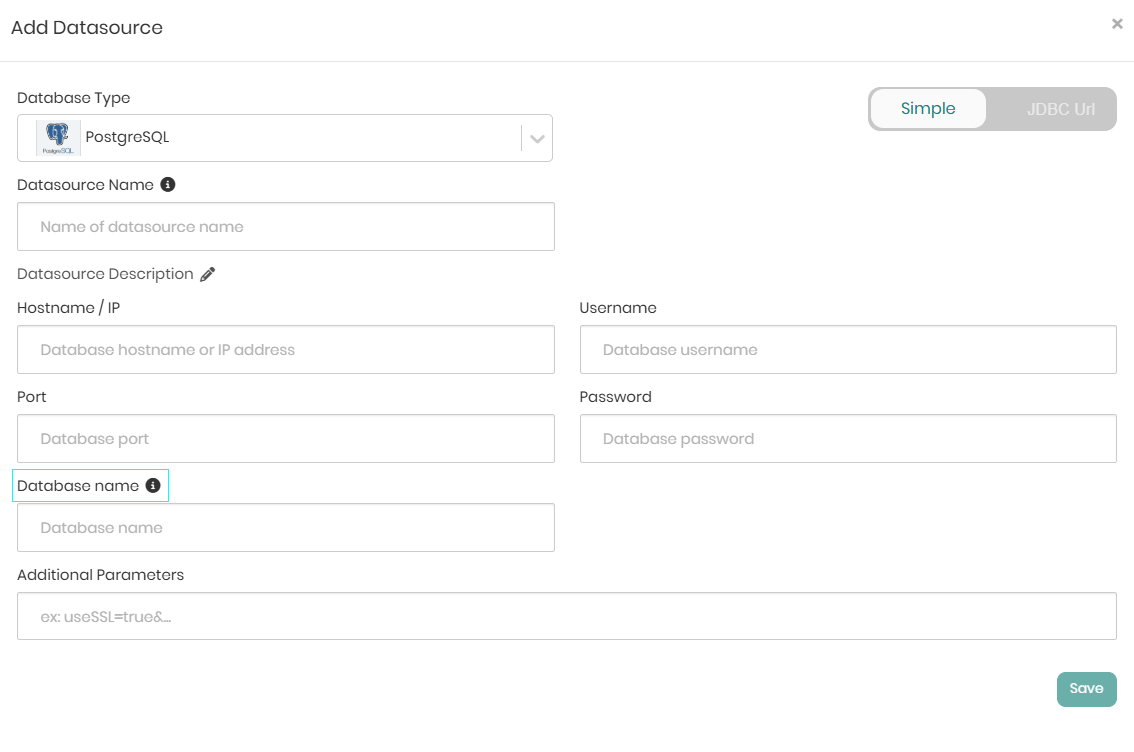
- Add New Datasource - On the top right when Add New Datasource is clicked on, a pop-up window will appear where all the relevant connection details must be provided in order to connect the datasource to the knowledge graph.

Each back-end datasource has slightly different requirements in order to connect to it, but the following information is required for the vast majority of the back-end datasources:
For detailed connection instructions for specific datasource types, see the Datasources integration guides, which include step-by-step instructions for popular databases like PostgreSQL, MySQL, MongoDB, and many others.
- The hostname for accessing the back-end datasource server
- The port for accessing the back-end datasource server
- The username for the back-end datasource
- The password for the back-end datasource
Some back-end datasources like PostgreSQL, Athena, and SAP Hana require to specify a database name in order to create a connection.
Other back-end datasources like Big Query require different information in order to create a connection. Parameters include:
- Project ID as specified in the Google BigQuery project
- Associated email with access to the project
- Private key file in JSON format, provided by Google BigQuery for authentication

If supported by the datasource back-end, optional additional parameters (Additional Params) can be integrated into the connection between the Knowledge Graph and the back-end datasource.
On the top right, the toggle can be switched from Simple to JDBC Url in order to connect the datasource using the relevant JDBC URL.
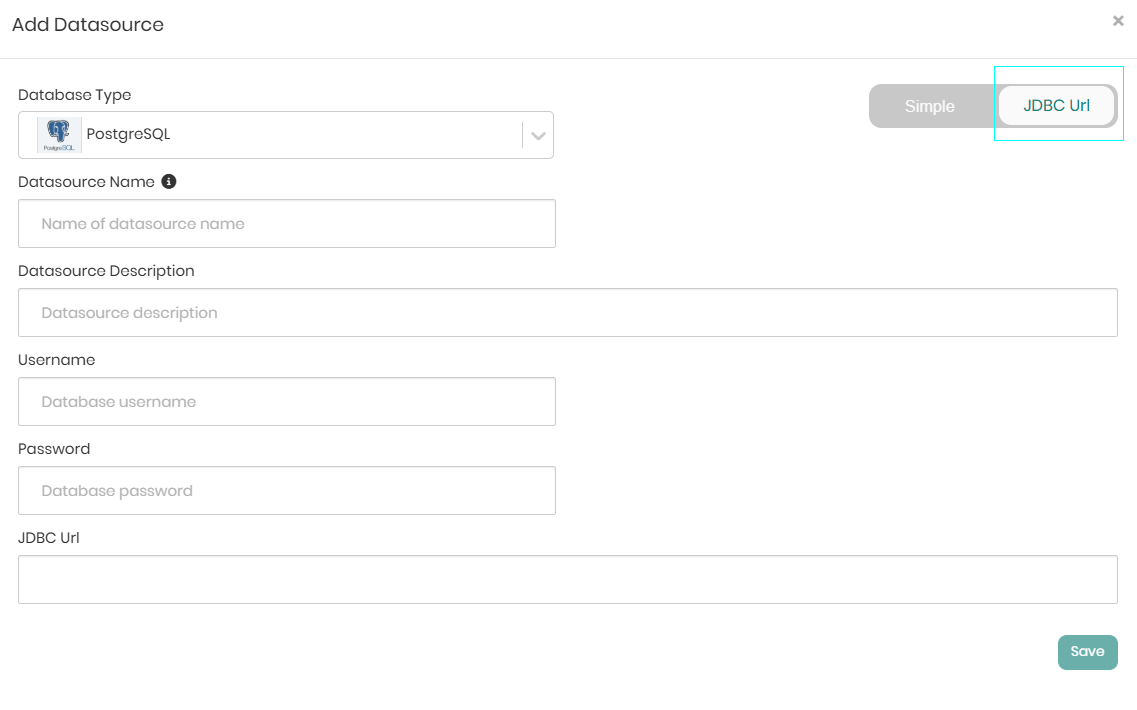
When the details are entered either with a username and password or via the JDBC URL, Save needs to be clicked in order to save the information and connect the datasource to the knowledge graph.
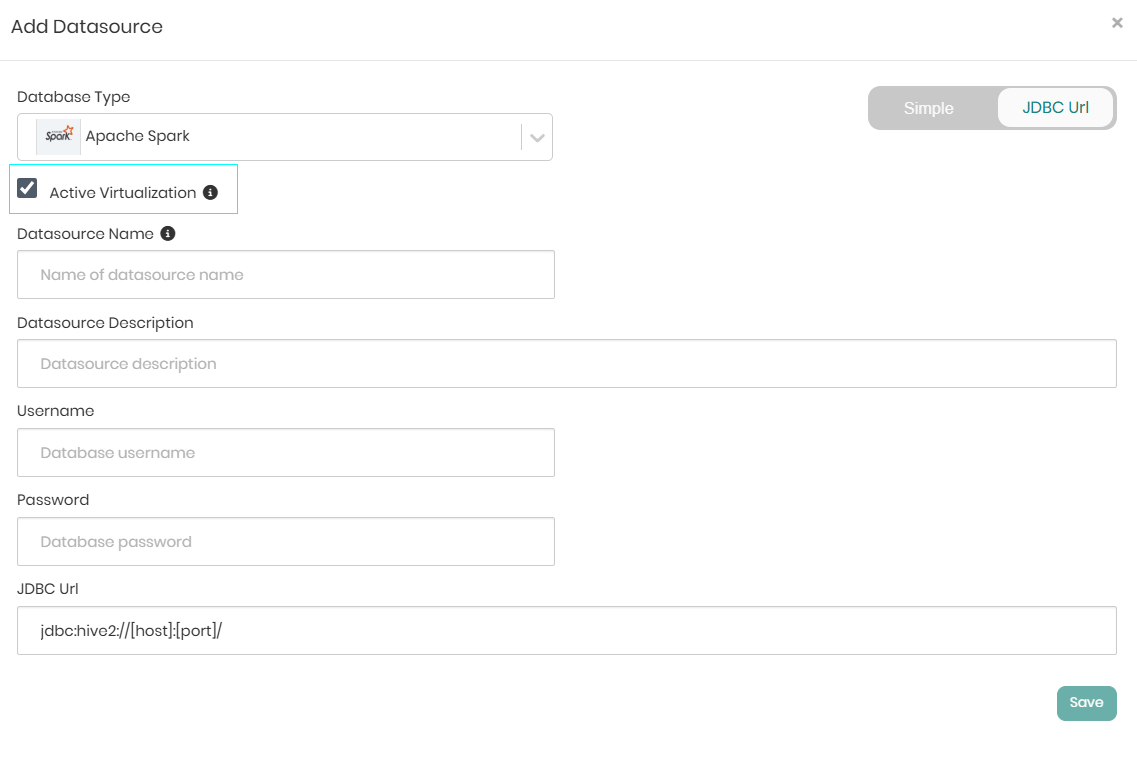
Timbr supports Virtualization for Apache Spark and Databricks datasources. When these datasources are selected, a checkbox with an option for Active Virtualization will appear which indicates whether virtualization is on or off for the specific datasource. This option can be switched on and off at a later time as well.
- Select datasource to assign to the Knowledge Graph - The second option for connecting a datasource to the knowledge graph, is by choosing an existing datasource that has already been connected from the list in the dropdown.
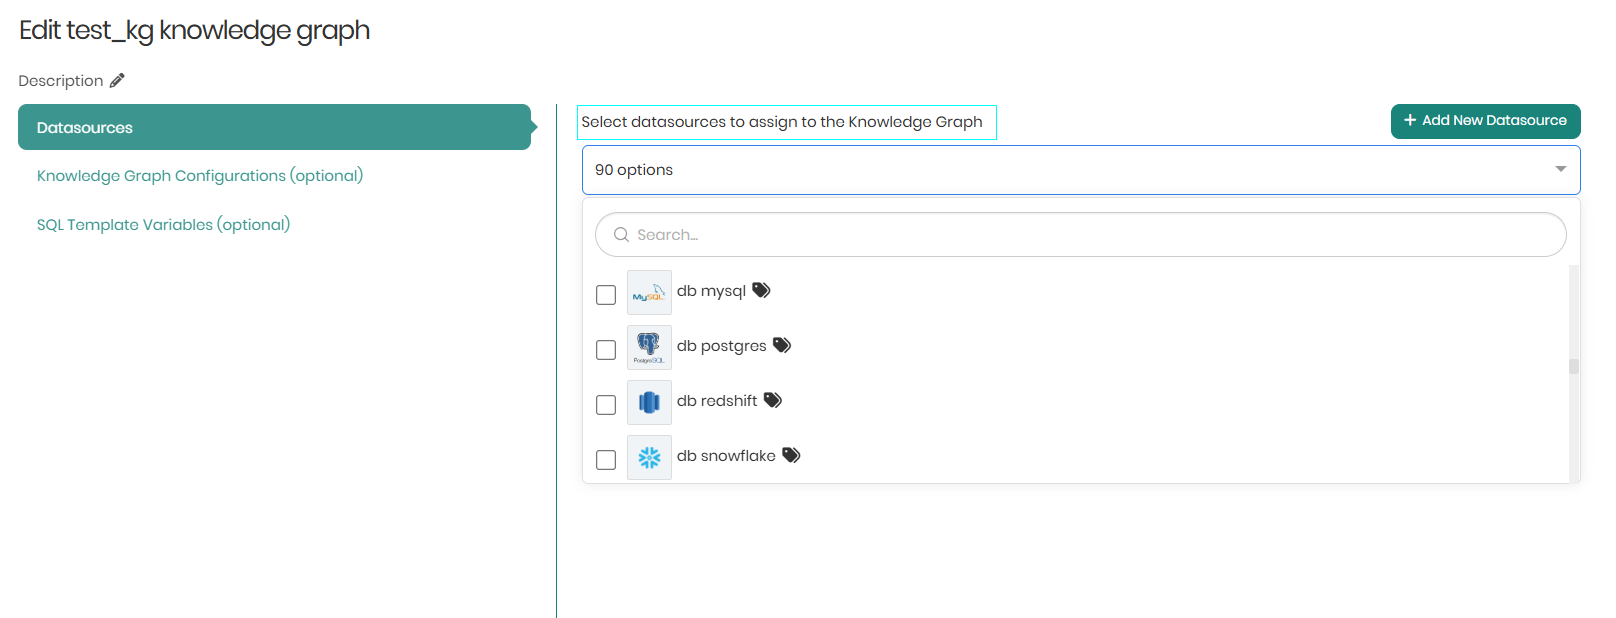
In cases where more than one datasource is chosen, we will be asked to select the Default active datasource which will be the default datasource when we query the knowledge graph for data.
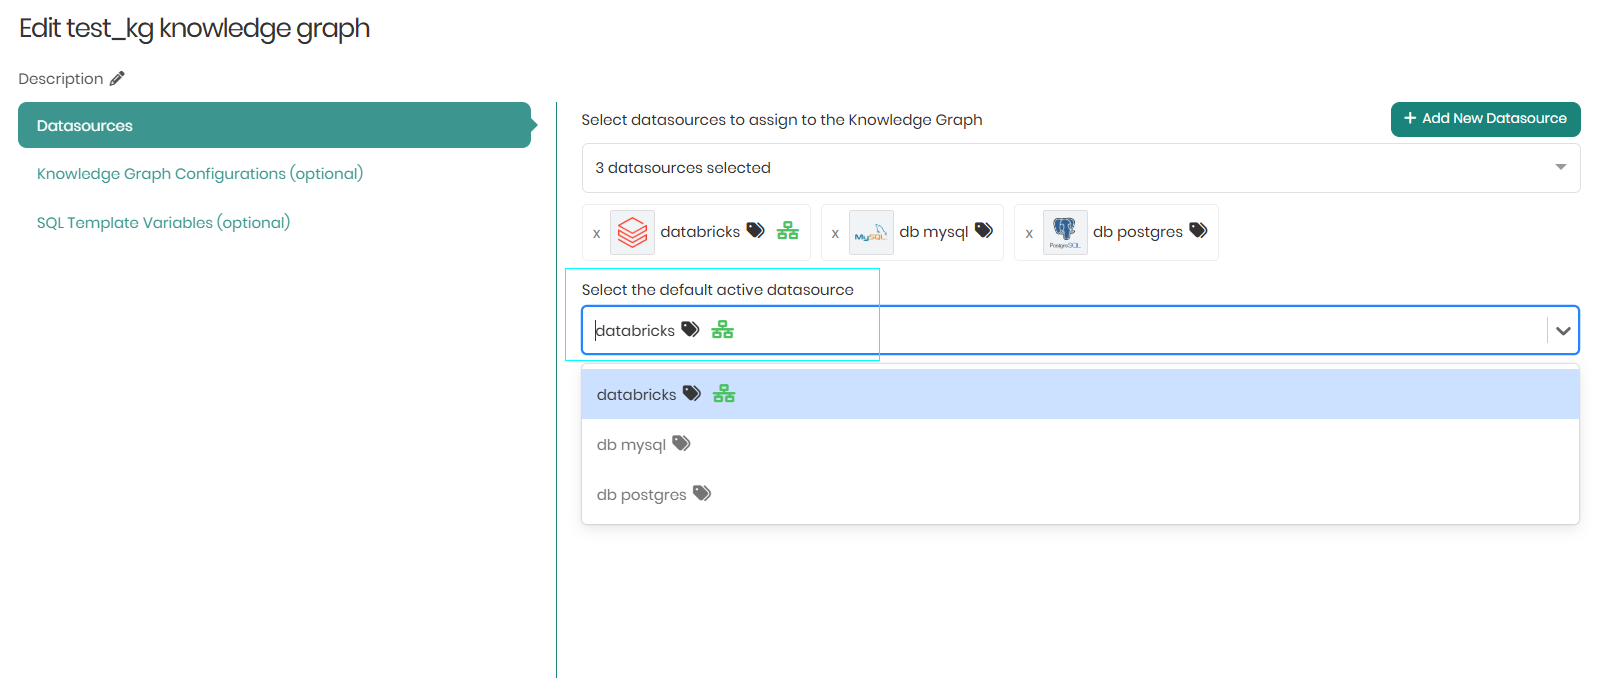
When using Virtualization to query concepts mapped from multiple datasources, make sure to set Apache Spark or Databricks as the default active datasource, which will enable you to query data that was mapped to the knowledge graph concepts from multiple datasources. So, if for example there are 3 datasources connected to a knowledge graph and you define that the Default active datasource does not contain virtualization, you will only be able to query the knowledge graph concepts that contain data mapped from the Default active datasource you chose.
Once again, when the details are entered Save needs to be clicked on the bottom right in order to save the information and connect the datasource or multiple datasources to the knowledge graph.
Knowledge Graph Configurations
The second tab is Knowledge Graph Configurations which contains different configurations that apply to a certain Knowledge Graph even outside of the Timbr-platform.
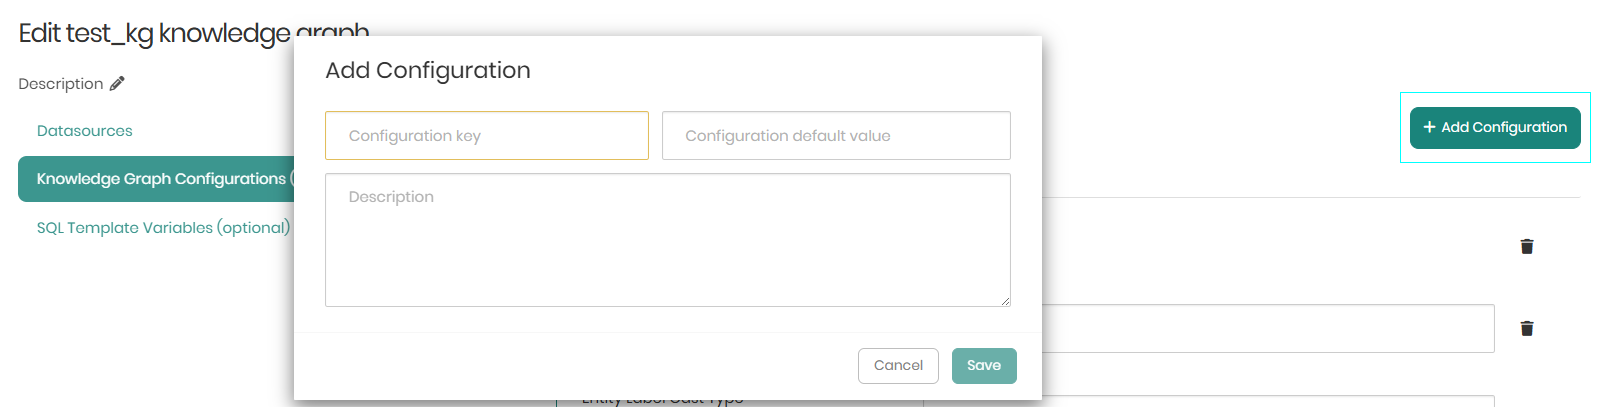
On the top right of the Knowledge Graph Configurations is Add Configuration. When clicked, a window will appear enabling users to define custom key-value pairs that control the knowledge graph's behavior and appearance.
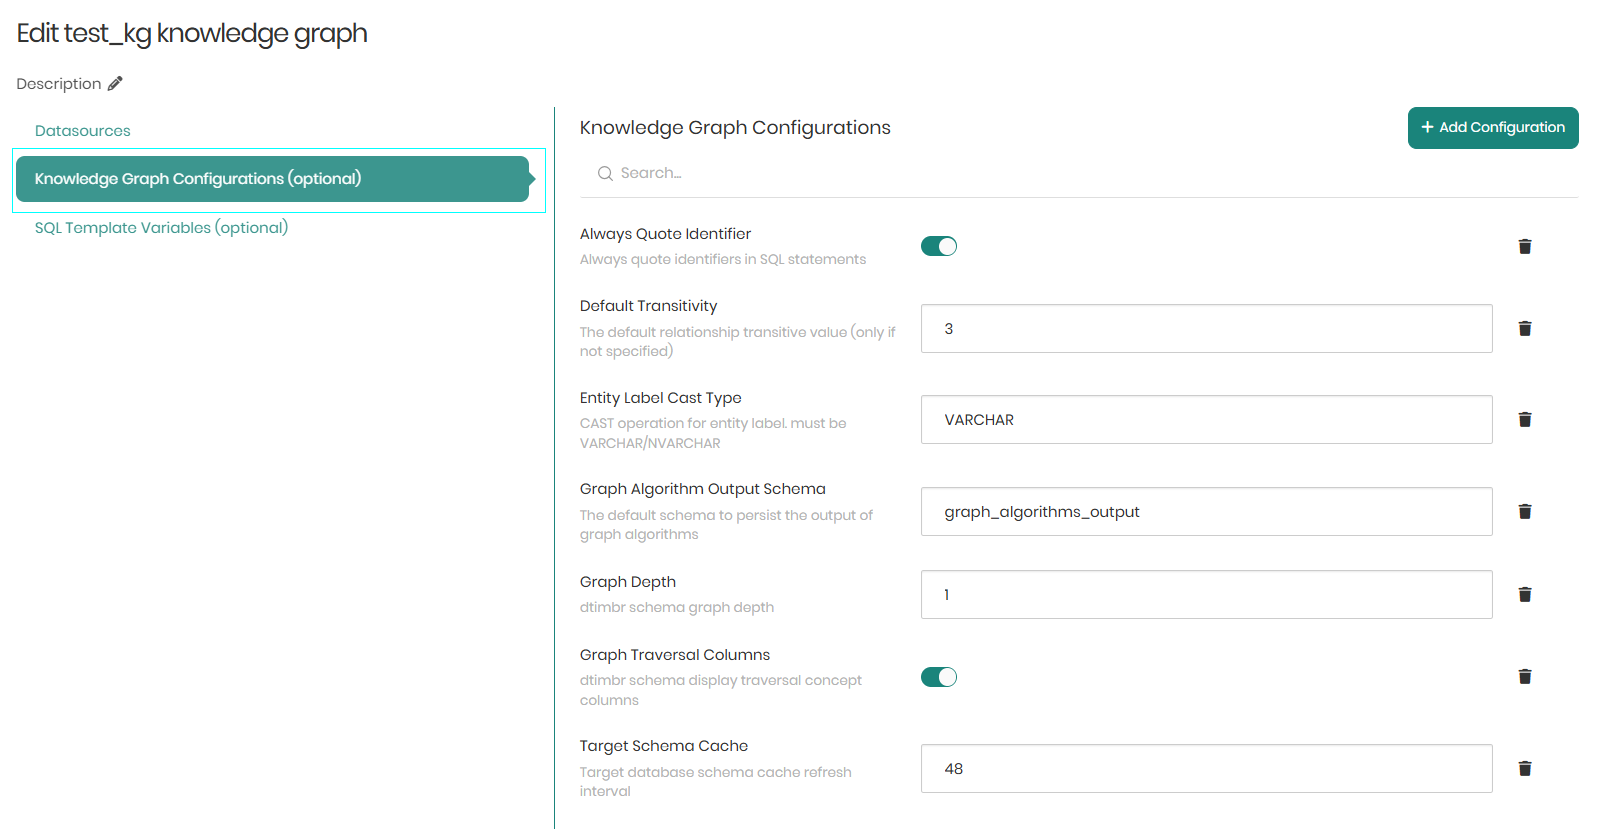
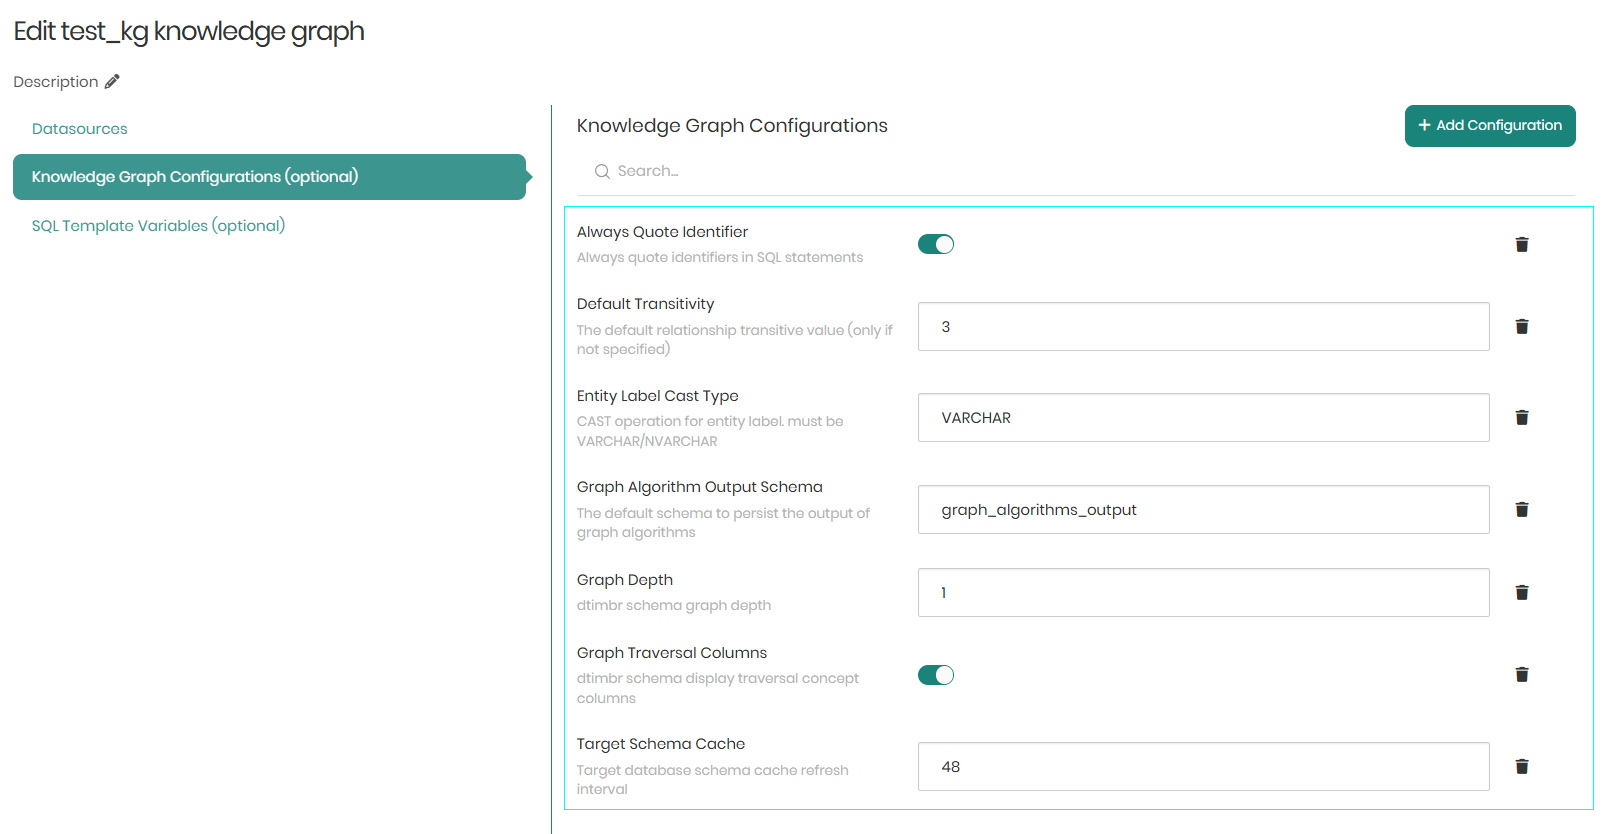
Beneath Add Configuration are the following configuration flags:
Always Quote Identifier - When the toggle is switched on, Timbr will show quote identifiers in SQL statements.
Default Transitivity - The default transitive relationship value.
Entity Label Cast Type - The Default CAST operation for the entity label (must be VARCHAR/NVARCHAR).
Graph Algorithm Output Schema - The default schema to persist the output of graph algorithms.
Graph Depth - The depth of graph traversals presented when requesting the meta-data of a concept in the dtimbr schema.
Graph Traversal Columns - When the toggle is switched on, it will display the properties relationships in the meta-data of a concept in the dtimbr schema.
Target Schema Cache - The Datasource schema cache refresh interval in hours.
Once the desired configurations are set, Save must be clicked on the bottom right in order to save the Knowledge Graph Configurations.
After the Save button is clicked in the main window, assuming all the information provided is valid, a new box representing the new Knowledge Graph will appear in the Knowledge Graph Manager component.
Once the Knowledge Graph appears in the Knowledge Graph Manager it can be used in all other sections of the Timbr platform.
SQL Template Variables
The third tab is SQL Template Variables which enables users to leverage Jinja templates to dynamically generate SQL queries. These templates facilitate the incorporation of ontology variables and user session variables into SQL queries, mappings, and ontology views, enhancing the flexibility and power of data manipulation and analysis.
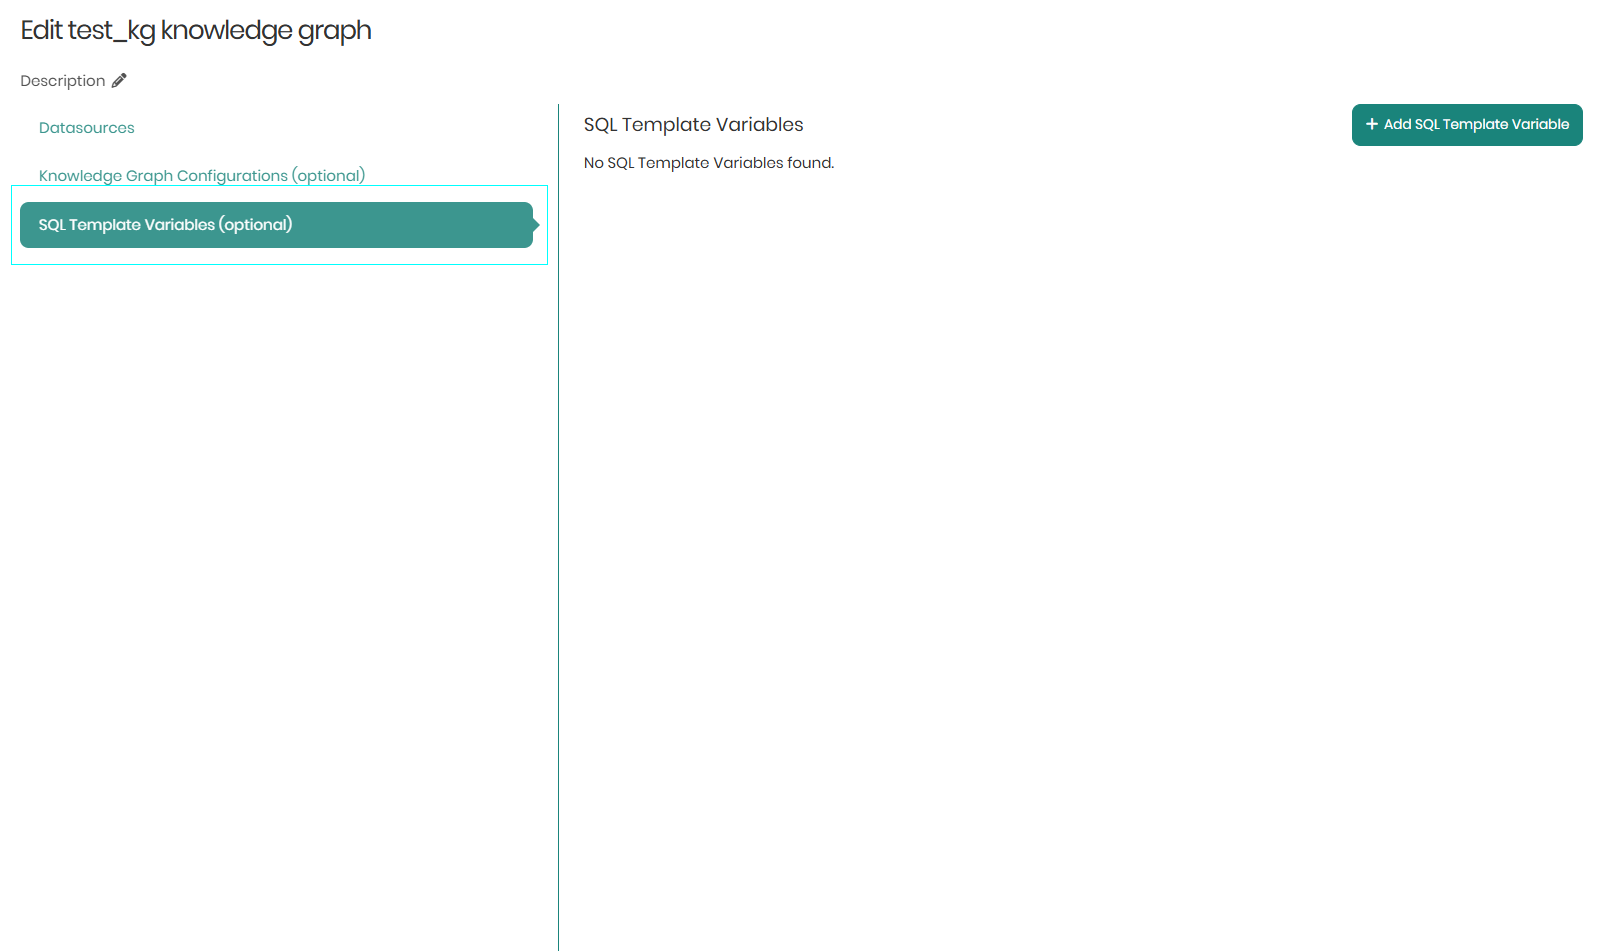
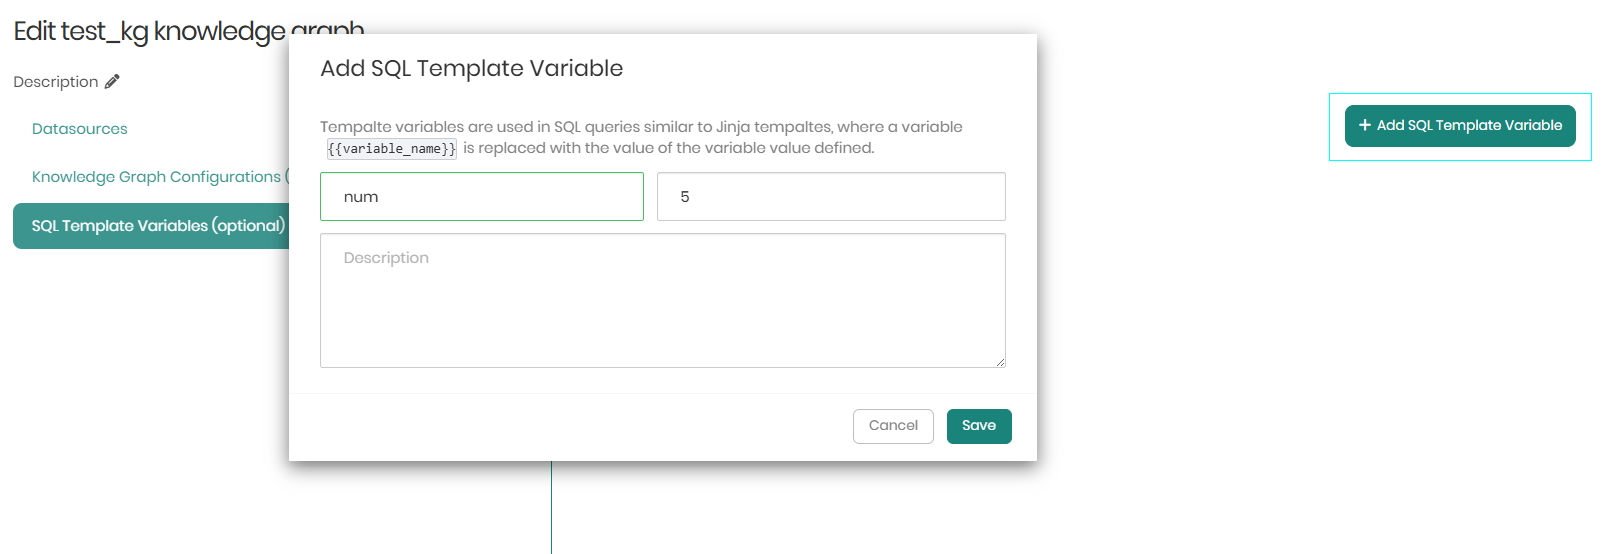
When clicking on Add SQL Template Variable, a window will appear in order to define the desired ontology variables.
Once the desired variables are set, Save must be clicked on the bottom right in order to save the SQL Template Variables.
Ontology variables
Ontology variables can be used in:
- SQL queries
- Mappings
- Ontology views