Datasources
The Datasources component manages the underlying data sources that power Timbr’s ontology-based semantic layer.
Datasources are connected to Knowledge Graphs, enabling the virtual knowledge graph to map, query, and integrate data across systems. Users can add, edit, and configure datasources, manage virtualization settings, and control access based on users or roles, ensuring secure and governed data access across the semantic layer.
If the datasource is Apache Spark or Databricks then the datasource can also be used as a virtualization engine and run queries from two different datasources.
Supported Datasources:
Timbr supports full back-end integration to any relational database that is SQL / ANSI SQL compliant or can be queried in SQL. The connection can be established either by a JDBC or ODBC connector.
The Timbr platform currently supports the following back-ends:
- Amazon Athena
- Amazon Redshift
- Amazon S3
- Apache Drill
- Apache Hive
- Apache Spark
- Azure Blob Storage
- Azure Datalake Storage
- Databricks
- Google BigQuery
- Google Cloud Storage
- IBM DB2
- Impala
- Microsoft SQL Server
- MySQL
- NetSuite
- Oracle
- PostgreSQL
- Presto
- Salesforce
- SAP Hana
- Snowflake
- Trino
- Vertica Analytics Platform
More can be added upon request
Manage Datasources
All the available datasources can be found in Manage Datasources, which can be accessed through the Manage tab by clicking on Datasources.
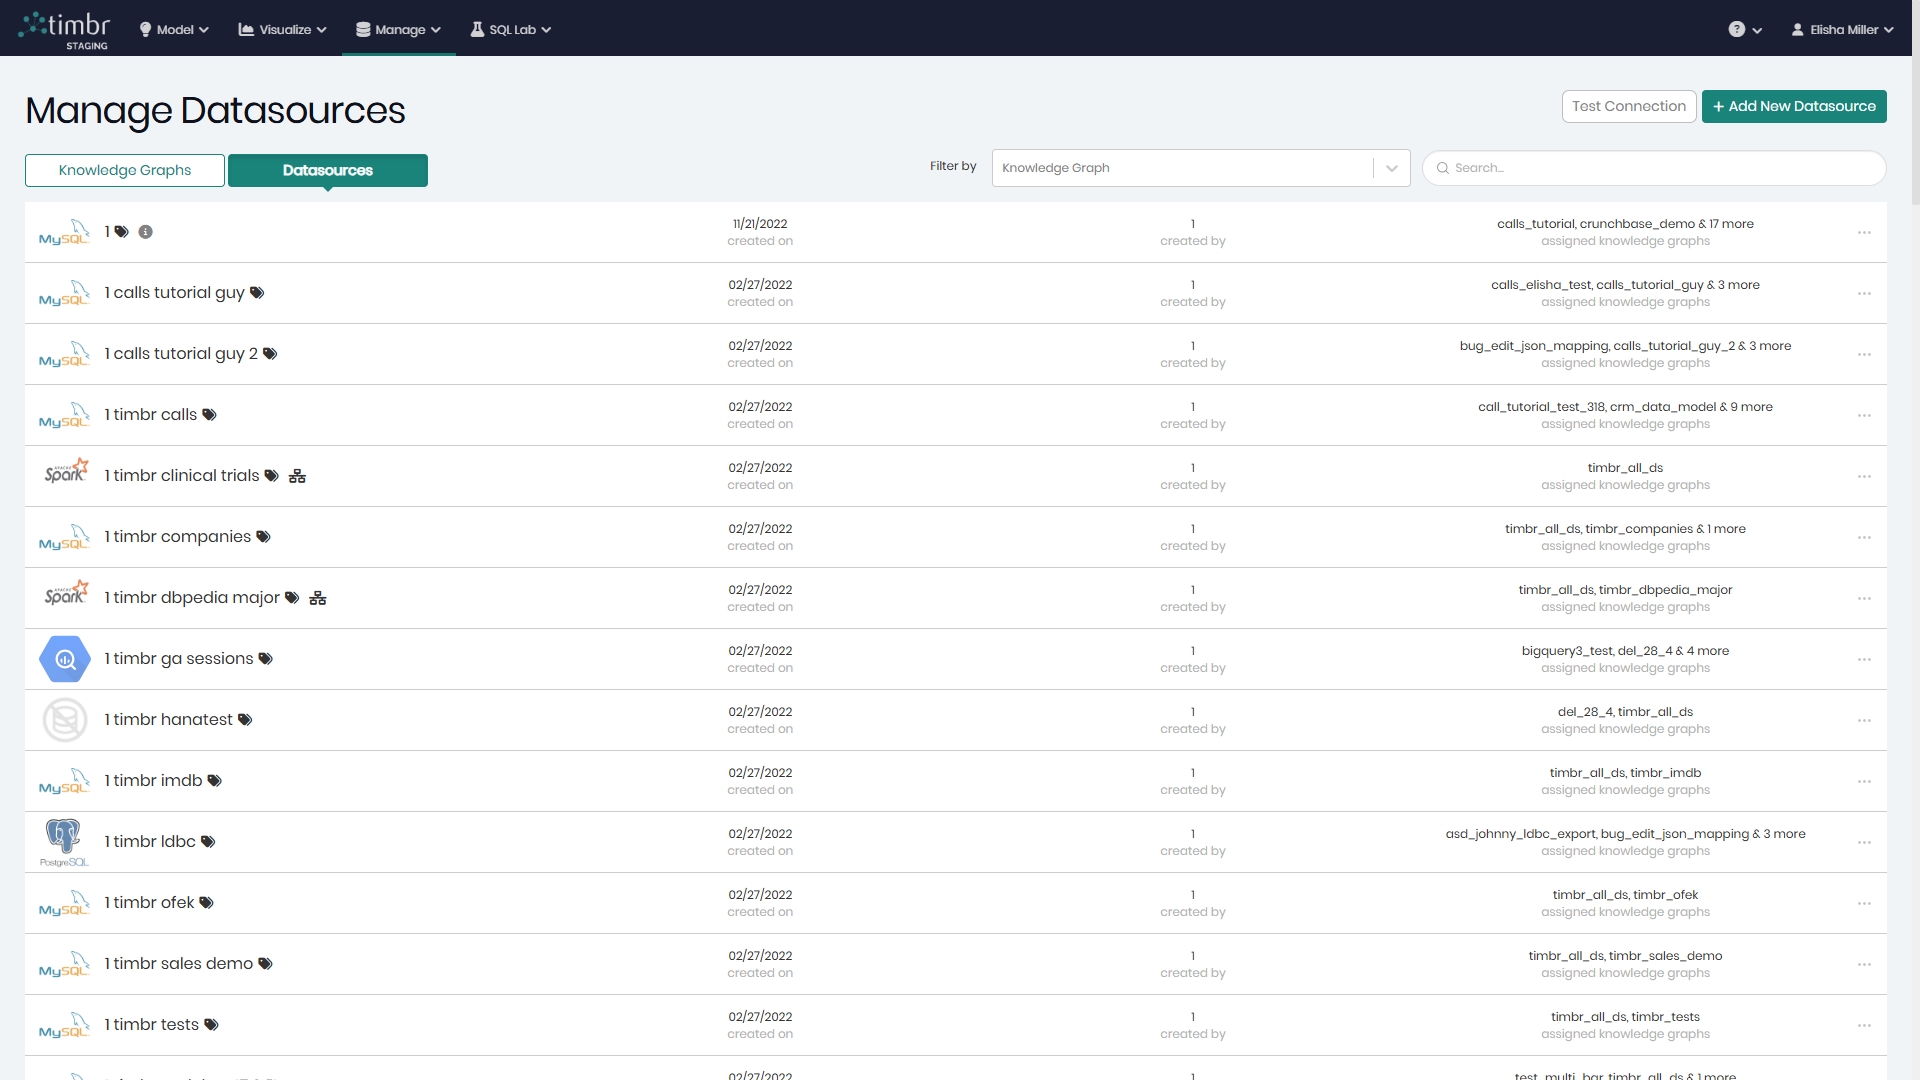
On the right of the screen are the search filters enabling you to search through the datasources by connected knowledge graphs as well as free text search.

Adding a new Datasource
on the top right is Test connection which when clicked on will open a window with a list of datasources that can be selected in order to test their connection. Next to Test connection is Add New Datasource that when clicked on will open a pop-up in order to begin adding a new datasource to the environment.

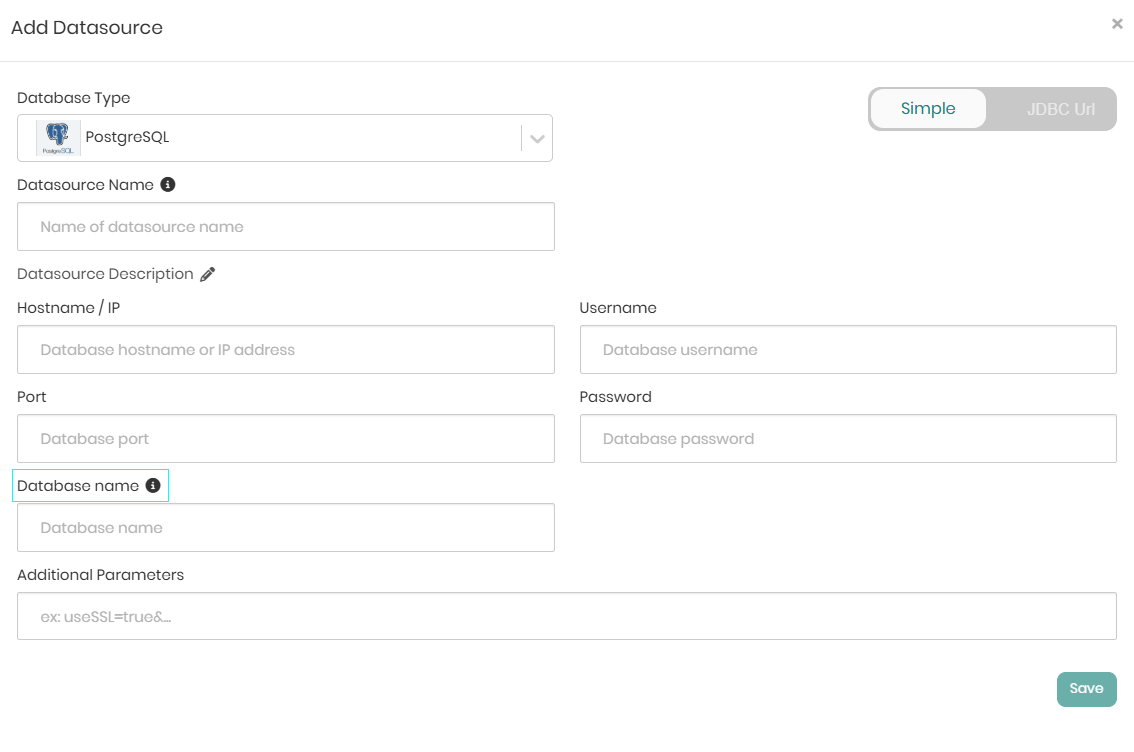
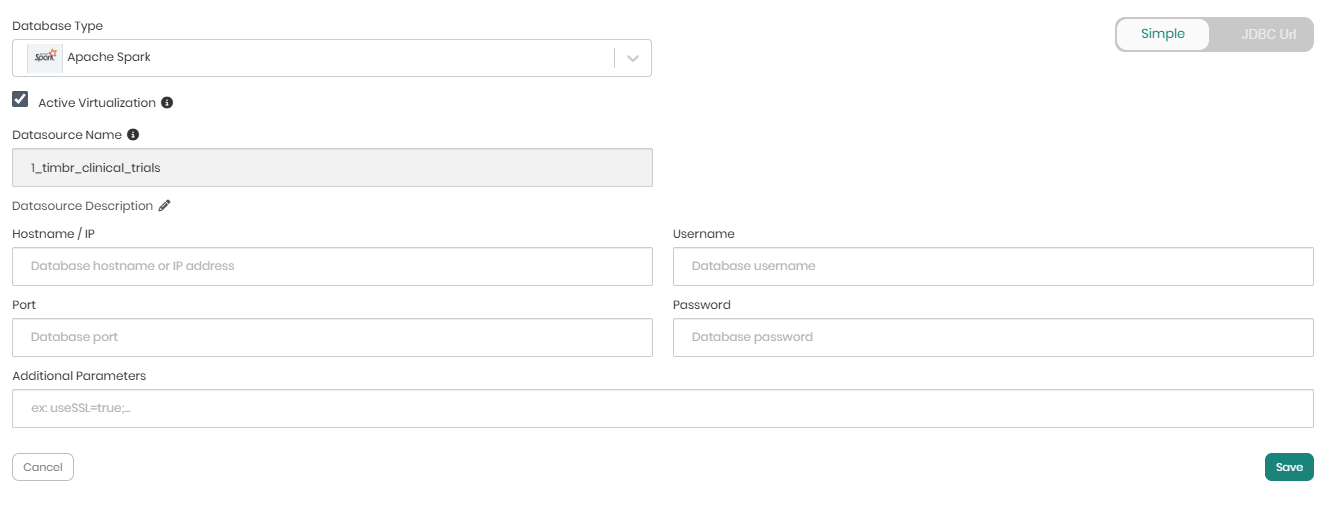
When Add New Datasource or the Add button are clicked on, a pop-up window will appear where all the relevant connection details must be provided in order to connect the datasource to the environment.

Each back-end datasource has slightly different requirements in order to connect to it, but the following information is required for the vast majority of the back-end datasources:
For specific connection instructions and requirements for popular datasources, refer to these integration guides:
- Amazon Athena
- Amazon Aurora
- Amazon Redshift
- Apache Drill
- Apache Hive
- Azure Synapse
- BigQuery
- ClickHouse
- MariaDB
- MongoDB
- MySQL
- NetSuite
- Oracle
- PostgreSQL
- Presto
- Salesforce
- SAP Hana
- Snowflake
- SQL Server
- Trino
- Vertica
Some back-end datasources like PostgreSQL, Athena, and SAP Hana require to specify a database name in order to create a connection
Other back-end datasources like Big Query require different information in order to create a connection. Parameters such as:
- Project ID as specified in the Google BigQuery project
- Associated email with access to the project
- Private key file in JSON format, provided by Google BigQuery for authentication

If supported by the datasource back-end, optional additional parameters (Additional Params) can be integrated into the connection between the Knowledge Graph and the back-end datasource
On the top right, the toggle can be switched from Simple to JDBC Url in order to connect the datasource using the relevant JDBC URL.
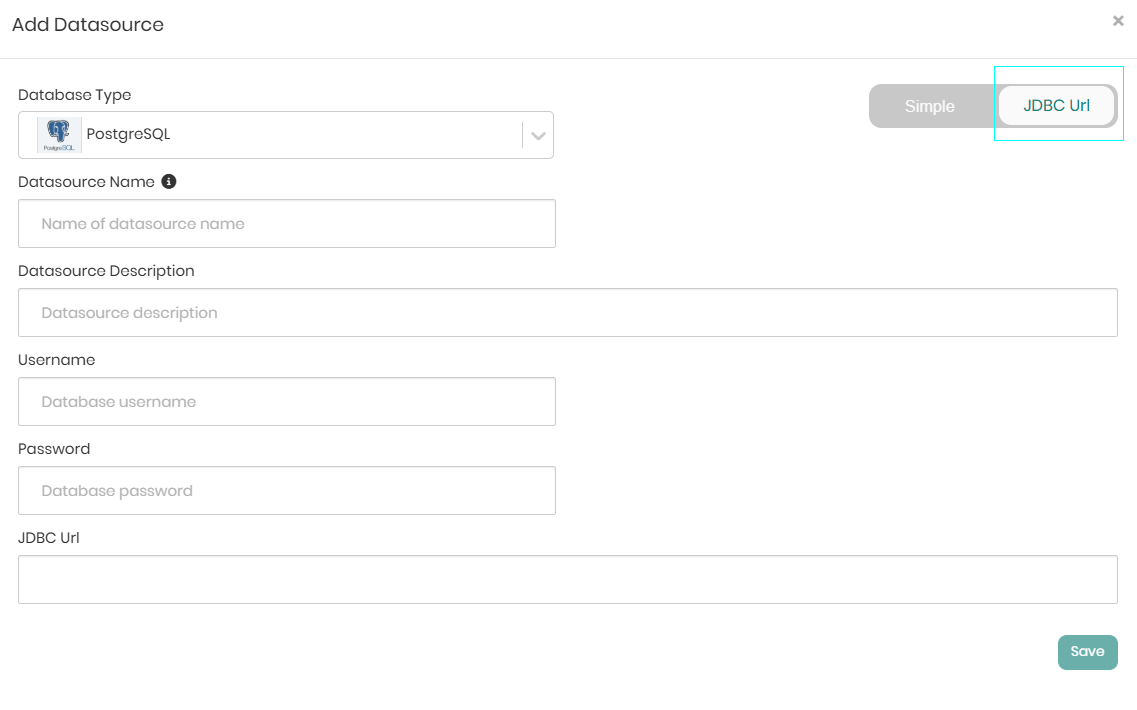
When the details are entered either with a username and password or via the JDBC URL, Save needs to be clicked in order to save the information and connect the datasource to the environment.
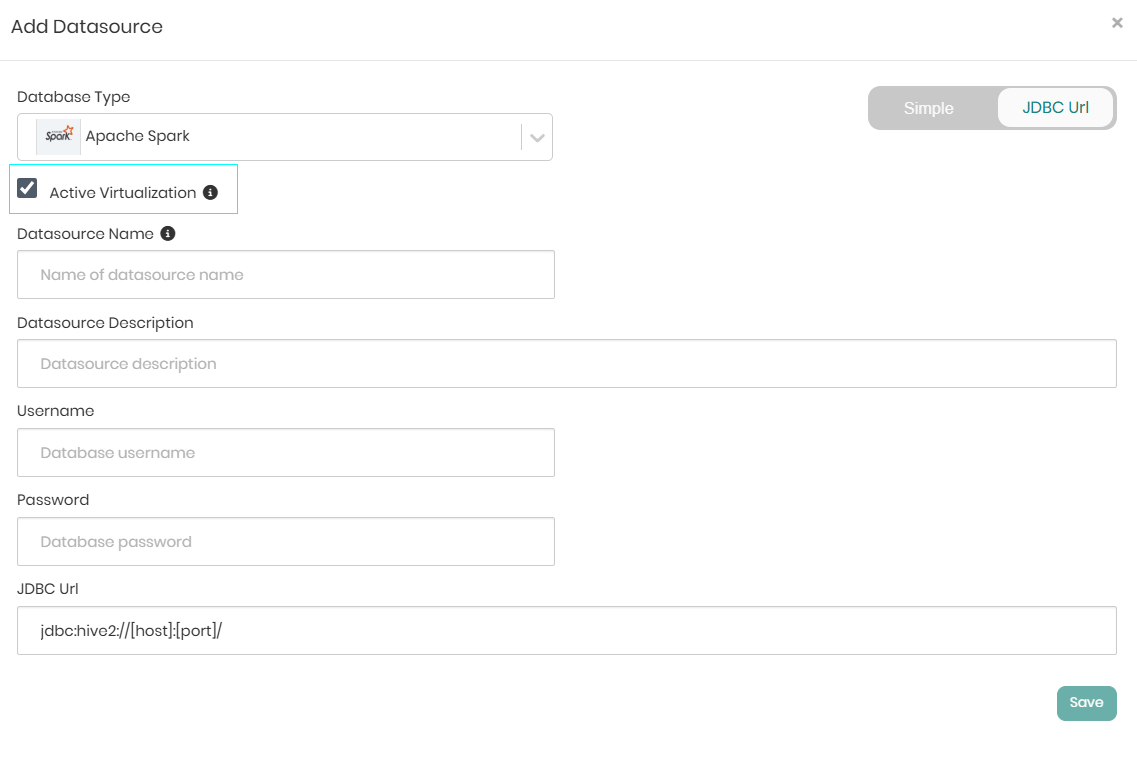
Timbr supports Virtualization for Apache Spark and Databricks datasources. When these datasources are selected, a checkbox with an option for Active Virtualization will appear, indicating whether virtualization is on or off for the specific datasource. This option can be switched on and off at a later time as well.
Editing an existing Datasource
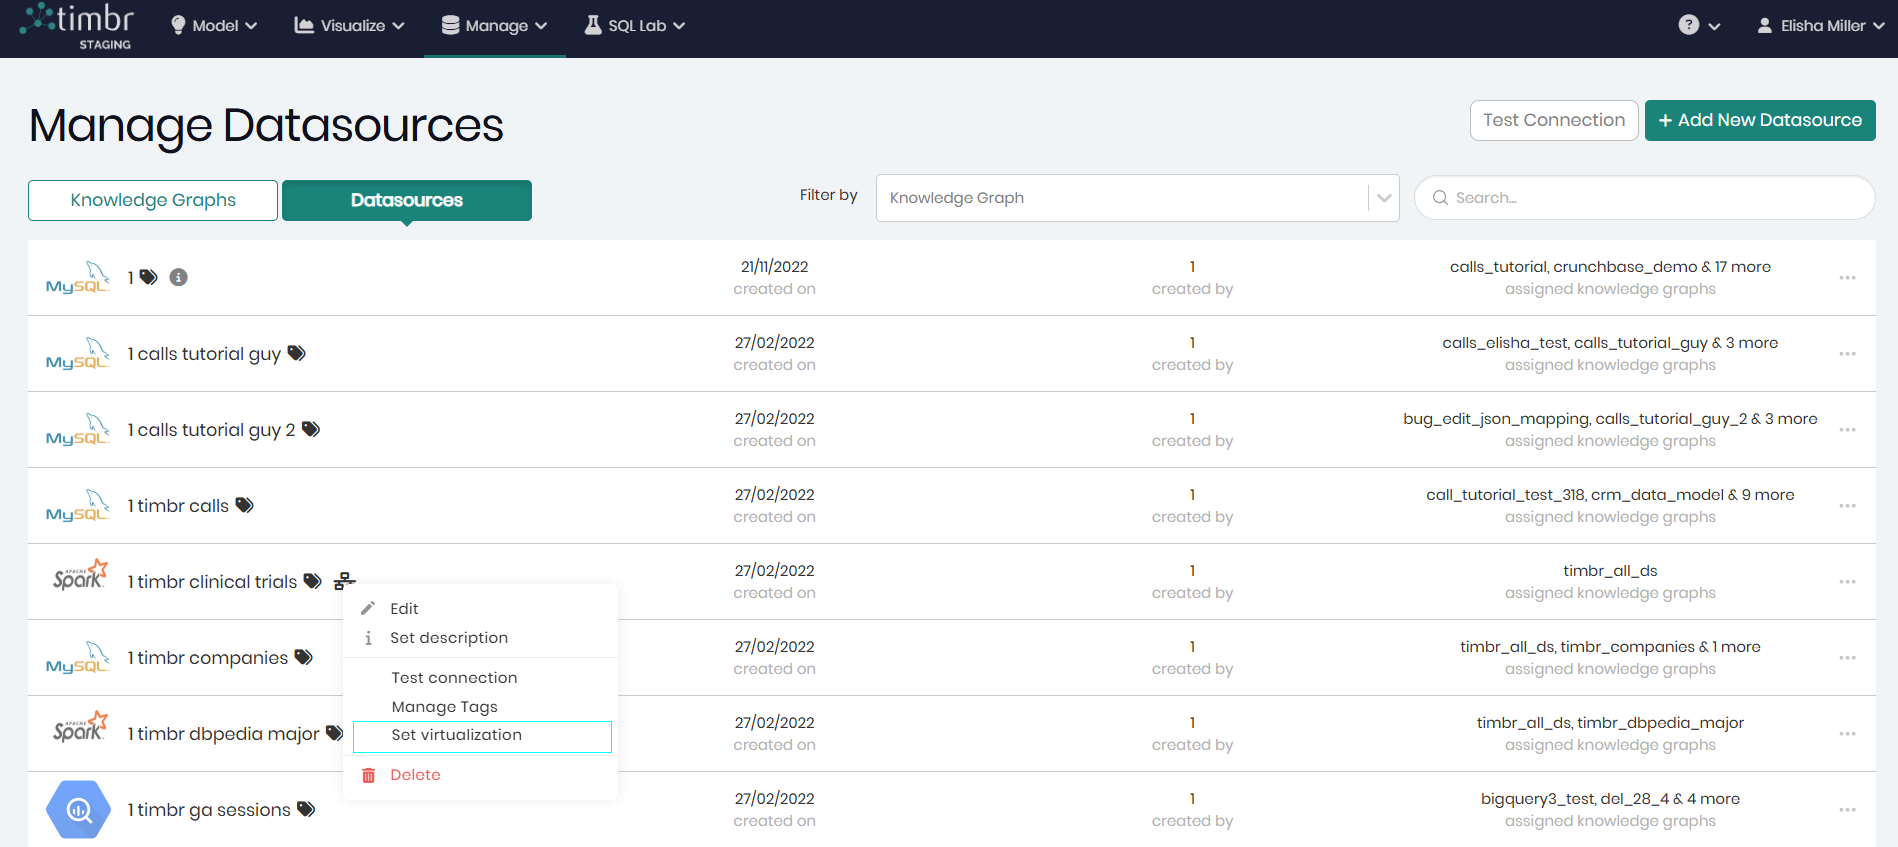
Each datasource row contains 3 horizontal dots on the right that when clicked on offer the following additional options on the selected Datasource:

Edit - Opens a window to edit the selected datasource and its different configurations.
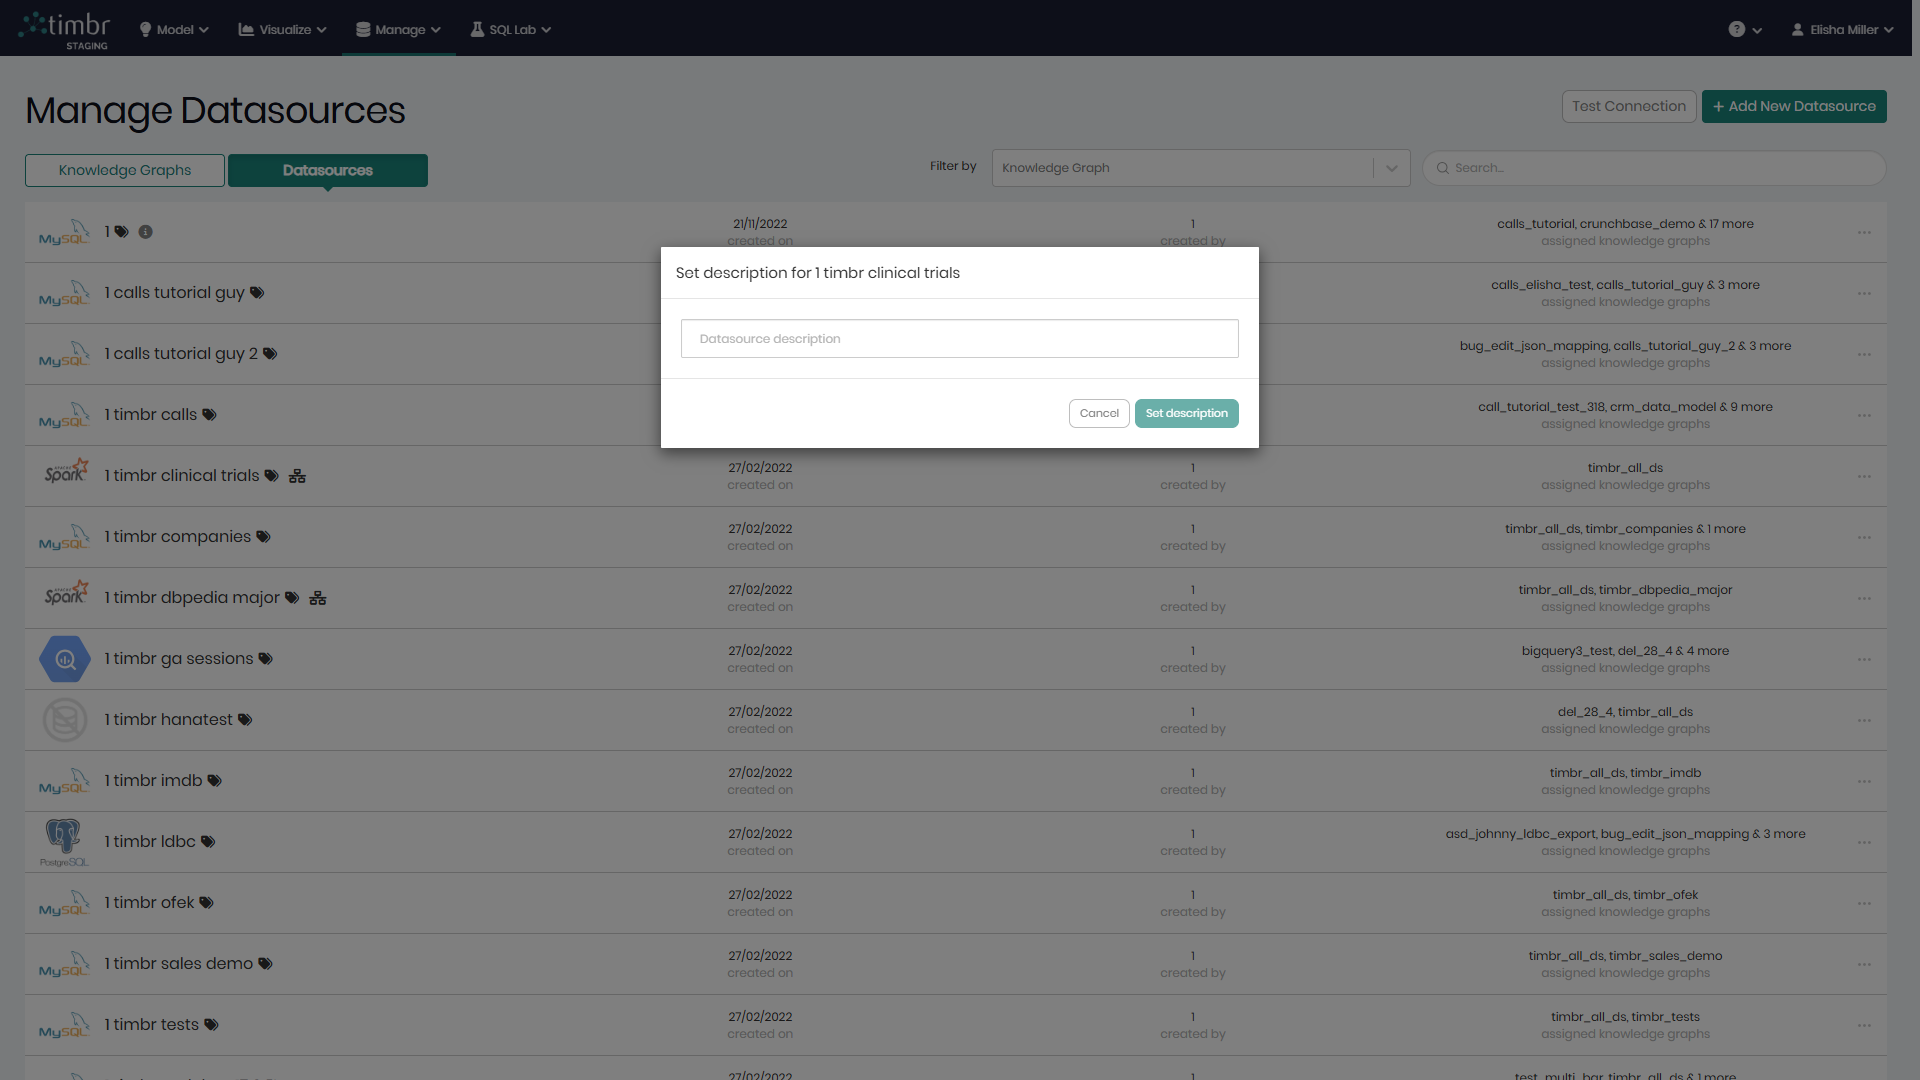
Set description - Enables to add a description to the datasource to further explain what it represents.
Test connection - Executes a quick test to verify the datasource’s connectivity, checking if it is active and responsive.
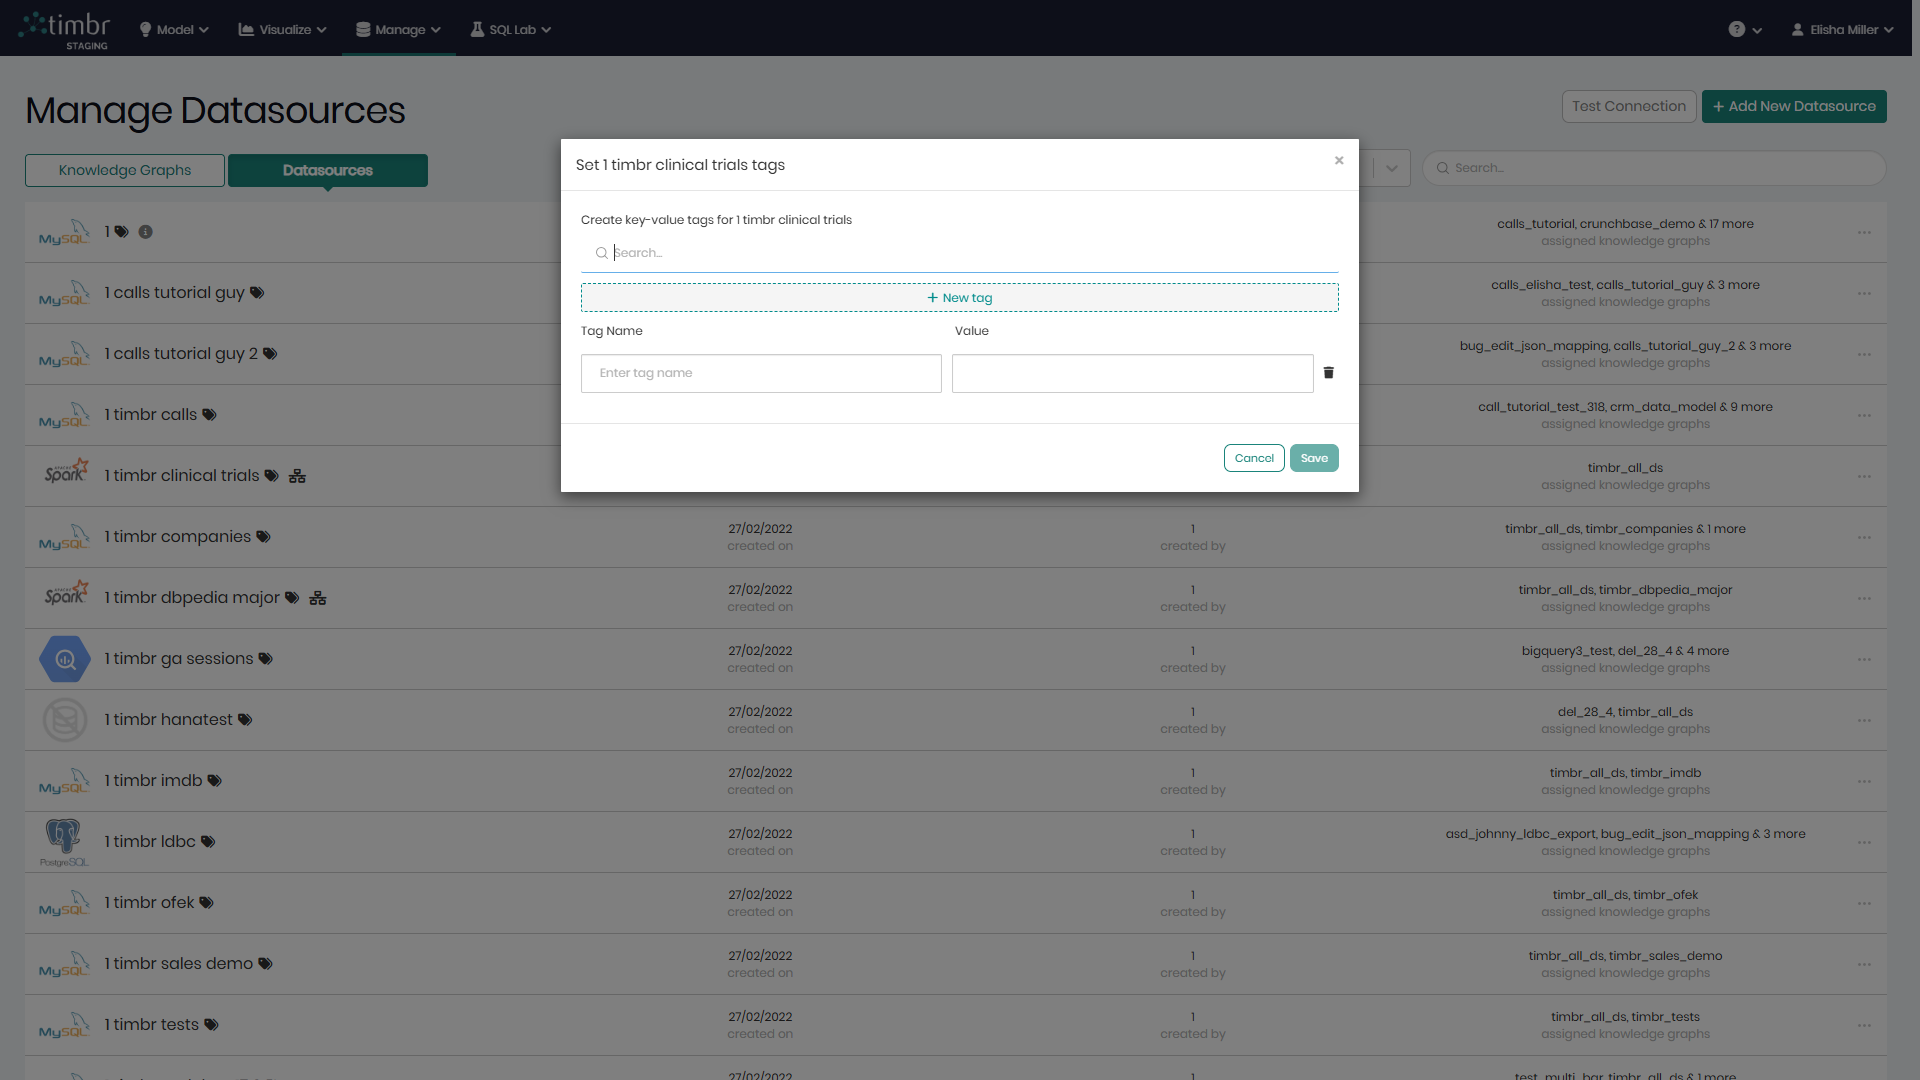
Manage Tags - Opens a pop-up window to manage the existing tags given to the knowledge graph, as well as the option to add new tags.
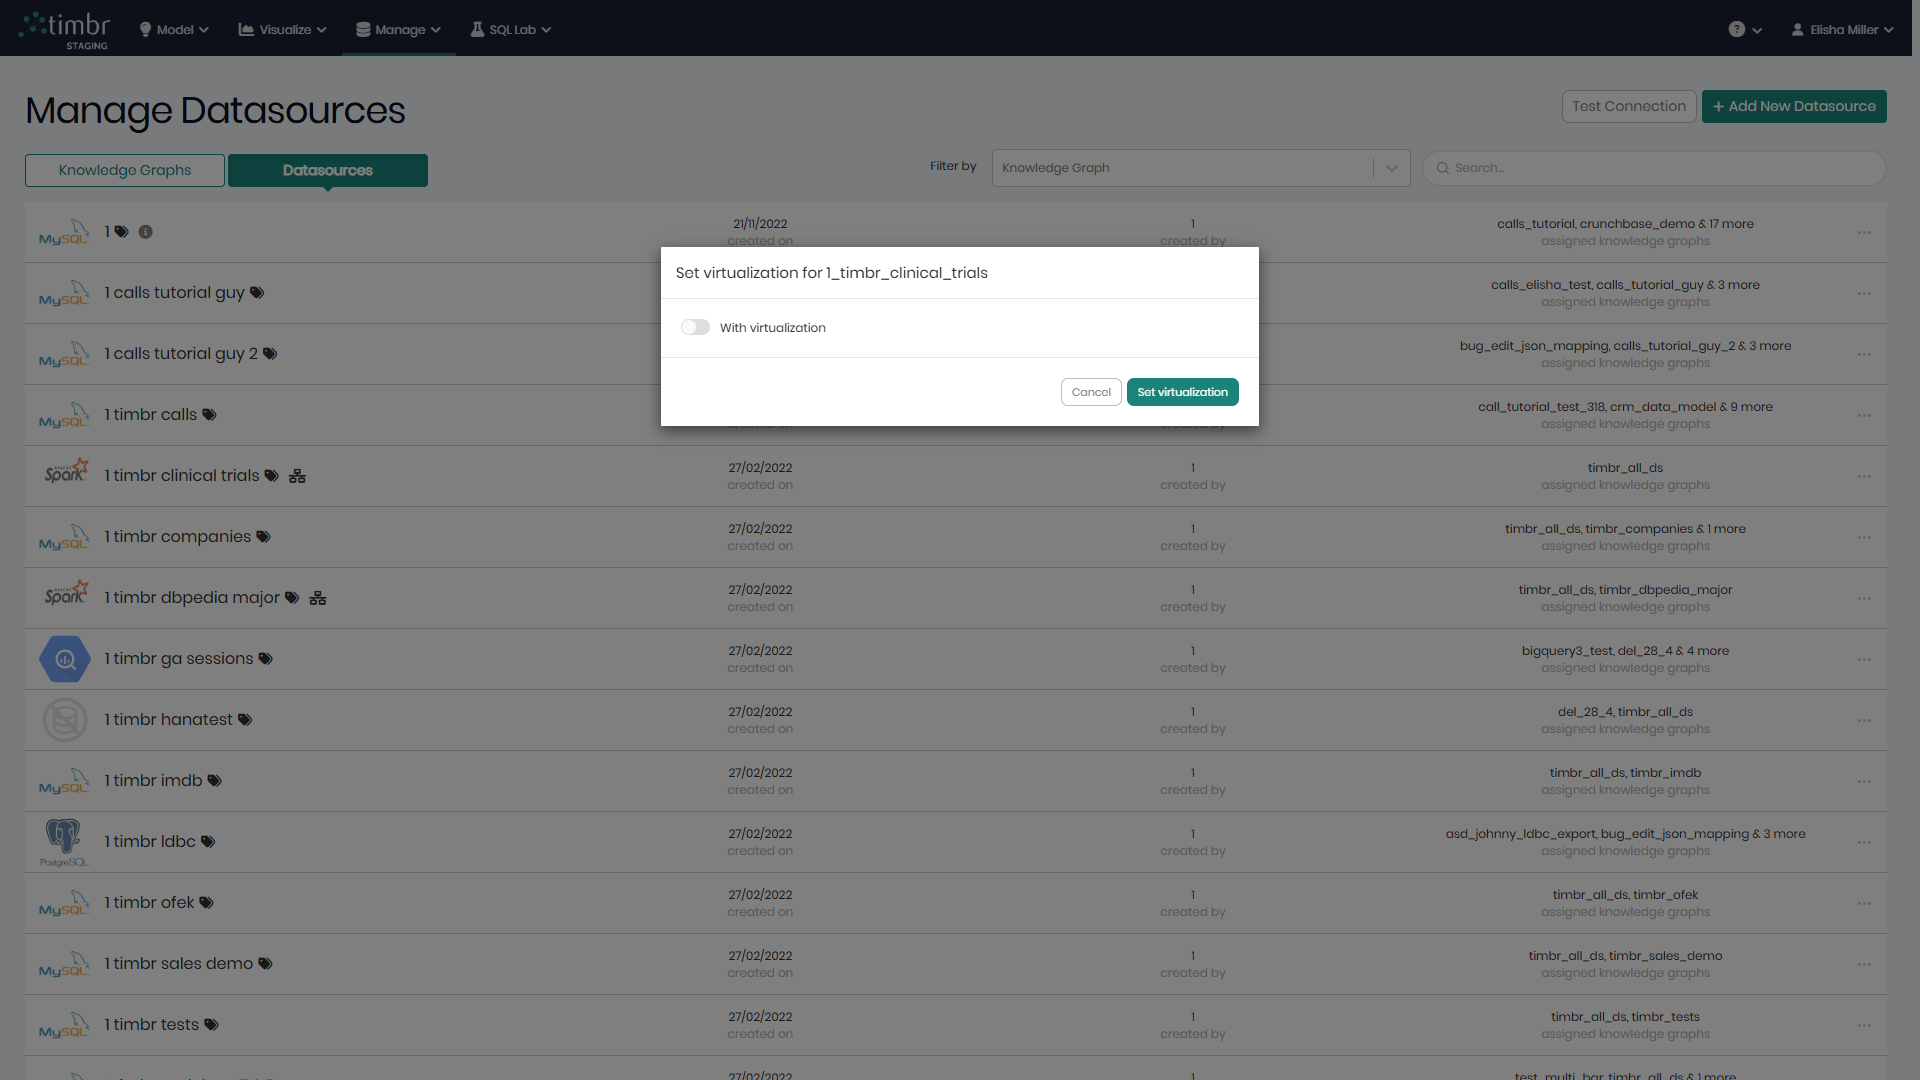
Set virtualization - Allows you to enable or disable virtualization for the selected datasource via a pop-up window. (This option is available only for datasources configured with virtualization capabilities as discussed below).
Delete - Deletes the selected datasource.
Timbr offers Virtualization with Apache Spark and Databricks so in addition to the name given to the datasource, a small icon appears next to each Apache Spark or Databricks datasource to indicate virtualization capability. When the virtualization is on the icon will be green, when it is turned off the icon will be black.

To turn the Virtualization on and off the virtualization icon can be clicked, as well as the 3 horizontal dots. Through either option you will find Set Virtualization In addition to the 5 options every datasource has which are: Edit, Set description, Test connection, Manage Tags, and Delete.
After Set Virtualization is clicked, in the window that appears, when the With virtualization toggle is turned on and Set virtualization is clicked on the bottom right, virtualization will be turned on and the icon will show green. When the With virtualization toggle is turned off and Set virtualization is clicked on the bottom right, virtualization will be turned off and the icon will show black.
